AX7 – Gantt Chart control

The Gantt Chart is an extremely powerfull way to present chronological data and interactions between actions. It is the go-to interface when working with tasks!

In earlier versions of AX we had a Gantt chart that looked like this:

AX7_Gantt_OldChart.png

The new Gantt chart for AX7 was designed to work with the web. Microsoft have licensed a third party HTML5 control and I really like it.

AX7_Gantt_NewChart.png

It looks very sleek and elegant and is very nice to interact with. It is touch friendly and you can customize the look to your wishes pretty easily.

Under the hood it has a wide variety of data inputs and can be configured to do many variations.

AX7_Gantt_Controls.png

Check it out:

The standard Gantt chart is available for Project and Production resources and other places around the solution. The quickest way to get a glance at this is by job planning a production order and click the Gantt button on the Schedule tab.

AX7_Gantt_Example.png

There is also a form that has no menu item that you can access in your environment to play around with the tutorial that is available for you to look at:

https://[YourAXSolution].cloudax.dynamics.com/?cmp=test&f=Tutorial_Gantt

AX7_Gantt_Tutorial

If you want to learn more about the Gantt chart, you can watch a video from October 2015 at Technical Conference where they talk about the control: https://mbspartner.microsoft.com/AX/Videos/832


AX expences app featured in Build keynote?

I noticed that during the Day 1 keynote that Microsoft did a very brief Cortana meets AX demo! It is in one of the last presentations that it is featured.

The demo shows a Cortana suggestion that is based on an email with a receipt for a taxi ride.

wp_ss_20160331_0001

Notice the MS Expenses 2.0 app? According to the presenter, this is the internal app used by Microsoft.

By clicking the app icon the app launches. Powered by Microsoft Dynamics AX.

wp_ss_20160331_0002.png

Cortana feeds the app the Expense report with the data gathered from the receipt.

wp_ss_20160331_0003

The expense is filled out completely with Category, date, Comment, amount, currency and a nice little PDF attachment (probably of the document).

wp_ss_20160331_0004.png

So Cortana found an email, saw that it was a receipt and marked it as such, read and populated related fields and then presented the user with the notification/suggestion. That is pretty powerfull…

The presenter goes on to show a other alert by Cortana on an Android phone where he is notified he has a pending travel expense report to send.

wp_ss_20160331_0005

That notification must be based on the MS Expenses 2.0 application.

wp_ss_20160331_0006

He submits the report at the end and moves on to more Cortana stuff.

(This post was both captured and written on my Lumia 950)


AX7 Timesheets: Basic setup

The timesheet solution is a part of the Project management and accounting module and is not integrated with Time and attendance. It is the best way of posting manual feedback about hour transactions to projects and project activities. This is often used in combination with time and attendance time stamp, but be carefull to not register time on the time registration terminals to projects when you do so as that will cause duplicate postings to project.

The users normally access the timesheets through the Employee self services, but ut can also be accessed through the Project management and accounting > Timesheets > My timesheets menu item.

Setting up the user

To make a user be able to access their time cards from the Employee self services workspace you first have to assign the user the Employee role and add a calendar to the employee: Human resources > Workers > Workers | Employement > Employement details > Calendar

You also have to add the desired period code to the users profile to set the range of the timesheets. This is done by clicking the Project pane and selecting “Project Setup”.

AX7_TA_ETC_ProjectSetup

This opens up a form to handle the setup for project related to this employee. You at least have to fill out the Period Code field, but there are some other fields that can be configured as well to handle the project timesheet.

AX7_TA_ETC_ProjectSetup2.png

Setting up period codes

A timesheet is a set of days grouped by the Period type (Period code), so before we begin we have to set up these.

You can set up period types by going to Organization administration > Setup > Calendars > Period types or drilling through on the worker setup form.

AX7_TA_PeriodTypes2.png

You can define your different period types like Weekly, Bi-Weekly, Monthly and so on and add these to the users like shown before.

After the period code has been created and added to the workers you have to create the timesheets. This is done by clicking “Generate periods” on the Period Types form.

AX7_TA_GeneratePeriods1.png

The dialogue that pops up gives you the possibility to create the given period for x number of periods from what date. Remember to set “Update timesheet periods” to Yes as this will create the timesheet periods in the same process. You can do it afterwards if you mess up by clicking the menu item for this in the same form.

AX7_TA_ETC_GeneratedPeriods.png

You can then review the timesheets by clicking the “Show timesheet periods”.

AX7_TA_ETC_TimesheetPeriods.png

Ready to use!

So after you’ve created the Timesheet period, related an employee to use this period for projects and then activated the “Use timecard” on the worker, you’re good to go.

To open the form you can go to the Employee self services workspace and click the “New timesheet”.

AX7_TA_ETC_ESSTimesheet.png

This opens a dialogue where the user can specify for what day he/she want to input data for. The timesheet period for this date is then selected.

AX7_TA_ETC_NewTimesheet.png

Then you’re ready to start filling out timesheets!

AX7_TA_ETC_Timesheet

AX7 T&A: Electronic Timecards

The concept of Electronic timecards are used to manually enter time or change your existing time journals based on your terminal registrations. The form is rather detailed and does require some end-user training, but it is a very powerfull tool for self service work. There is an alternative to Electronic timecards in the Project management and accounting module called Timesheets. The timesheets are much easier to use and require less input from the user.

For project workers only doing registration of time to projects and still want to use time and attendance, I would recommend using a combination of the two. Just be aware that you can register time on a terminal AND do timesheets that will lead to duplicate data. So if you use a combination, then make sure you’re not checked in to a project on the time and attendance terminals.

For manufacturing workers it is nice to let them enter this form to confirmed or change time registered before it is reviewed by the forman.

Activating a user

On the Worker simply activate the “Use timecard” parameter.

AX7_TA_UseTimecard

The user will now be able to input Electronic timecards by going to Common > Common > Time and attendance > Electronic timecard.

Once this is registered, any user can access this timecard. I therefore recommend using passwords on these users to preserve some type of security.

The user has to select the right user from the dialogue and is then presented with the Electronic timecard.

To open the electronic time card. Go to: Common > Common > Time and attendance > Electronic timecards. When opening the form the user has to identify the user. The system suggests the current logged in user, but he/she can select another user is need be.

AX7_TA_ETC_SelectUser.png

The form is opened for the selected user on the current date.

AX7_TA_ETC.png

The list will be populated by the terminal registrations if there are any registered.

Locked or unlocked?

The form can be locked to a specific user. You can not edit the lines without locking it. This is to ensure that only one user is editing at the same time. Click the “Lock” button before you start to edit.

AX7_TA_ETC_Locked
When form status says “Lock”, the user can only see their transactions.


AX7_TA_ETC_Unlocked
Unlocked status means the form is opened up for editing

Find the right day and time profile

The Electronic timecard form is opened on todays date and it is easy to select another day for the week selected by clicking the weekday name radio buttons.

AX7_TA_ETC_DaySelect.png

The profile is based on the users proposed time profile, but the user can change it if need be. This is often used if the worker has worked a different shift then is planned.

Entering and/or changing transactions

There are a lot of different types of time registration types to select from.

AX7_TA_ETC_RegType.png

The Clock in and Clock out types does not require the user to select any job. In these cases selecting the type and then start time is sufficient.

AX7_TA_ETC_ClockedIn.png

The other type of transactions require the user to select a job. The “Journal registration type” and “Reference” fields can be used to limit the selection in the Job identification selection, but it is not required. So you only need to enter the Job ID.

On project transactions that are manually entered the Category must be filled out and is defaulted to what is set on the workers time and attendance settings.

To enter switch codes you click the “Switch code” menu item. These are not added as lines in the form. Read more on switch codes here.

Check and transfer

Once the form is complete, the user can “Check” the timecard registrations done.

AX7_TA_ETC_WrongClockIn.png
This timesheet has a wrong Clock In time.


Clicking the check function opens this dialogue.

AX7_TA_ETC_Check

If for instance you have a errors in the lines you will get errors in the message center.

AX7_TA_ETC_CheckErrors

Multiple errors might be the result of only one mistake in the lines, like this example. The clock in is sat to late. Changing this to the right time will remove all errors.

AX7_TA_ETC_FilledOut

Once the transactions are checked with no errors, the worker can transfer. You can not transfer with errors, so it is sufficient to click the Transfer button. This will also execute the “Check”.

AX7_TA_ETC_Properties.png

Calculation

After the forman or team leader has done the calculation the sums for the day are created and the user can control these. In the Properties, at the bottom of the form, you will see if the day is calculated or not.

AX7_TA_ETC_Properties2.png

Once calculated the Electronic timecard can not be changed. The sum of the day can be viewed by clicking Calculation in the form menu.

AX7_TA_ETC_Calc

Go to the AX 7 – Time and Attendance guide page


Dynamics AX Vendor Portal (AX7)

General notes

The vendor portal in Dynamics AX 2012 was based on the enterprise portal and used the SharePoint platform as an underlying architecture. If you’ve ever tried to do an amendments to this solution beyond standard functionality you probably have an alsore from the process and you’re not recommending this again. I’ve personally worked a lot lately with the Customer self service portal amendments for AX 2012 and it was much harder and more problematic. Luckily I was blessed with a great developer to assist me, but I will not willingly though my self in to a similar project in the future.

Now that Dynamics AX is totally based on a cloud framework it opens new possibilities. The Customer self service is not available yet, but an early version of the Vendor portal, Manager self service and Employee self services are available.

The early version of this functionality brings a limited set of features, but it is promised to be further developed quite rapidly. The potential for this platform is enormous and it is a crime to let this feature be left untouched by any purchasing organization.

I want to show you how easy it is to set up access and the basic features of the vendor portal, so let’s take a closer look.
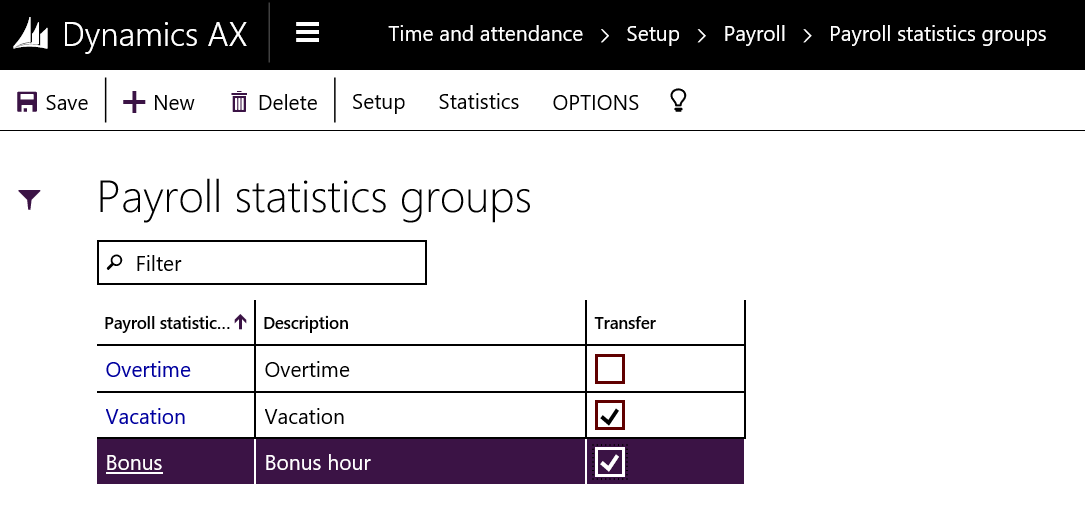
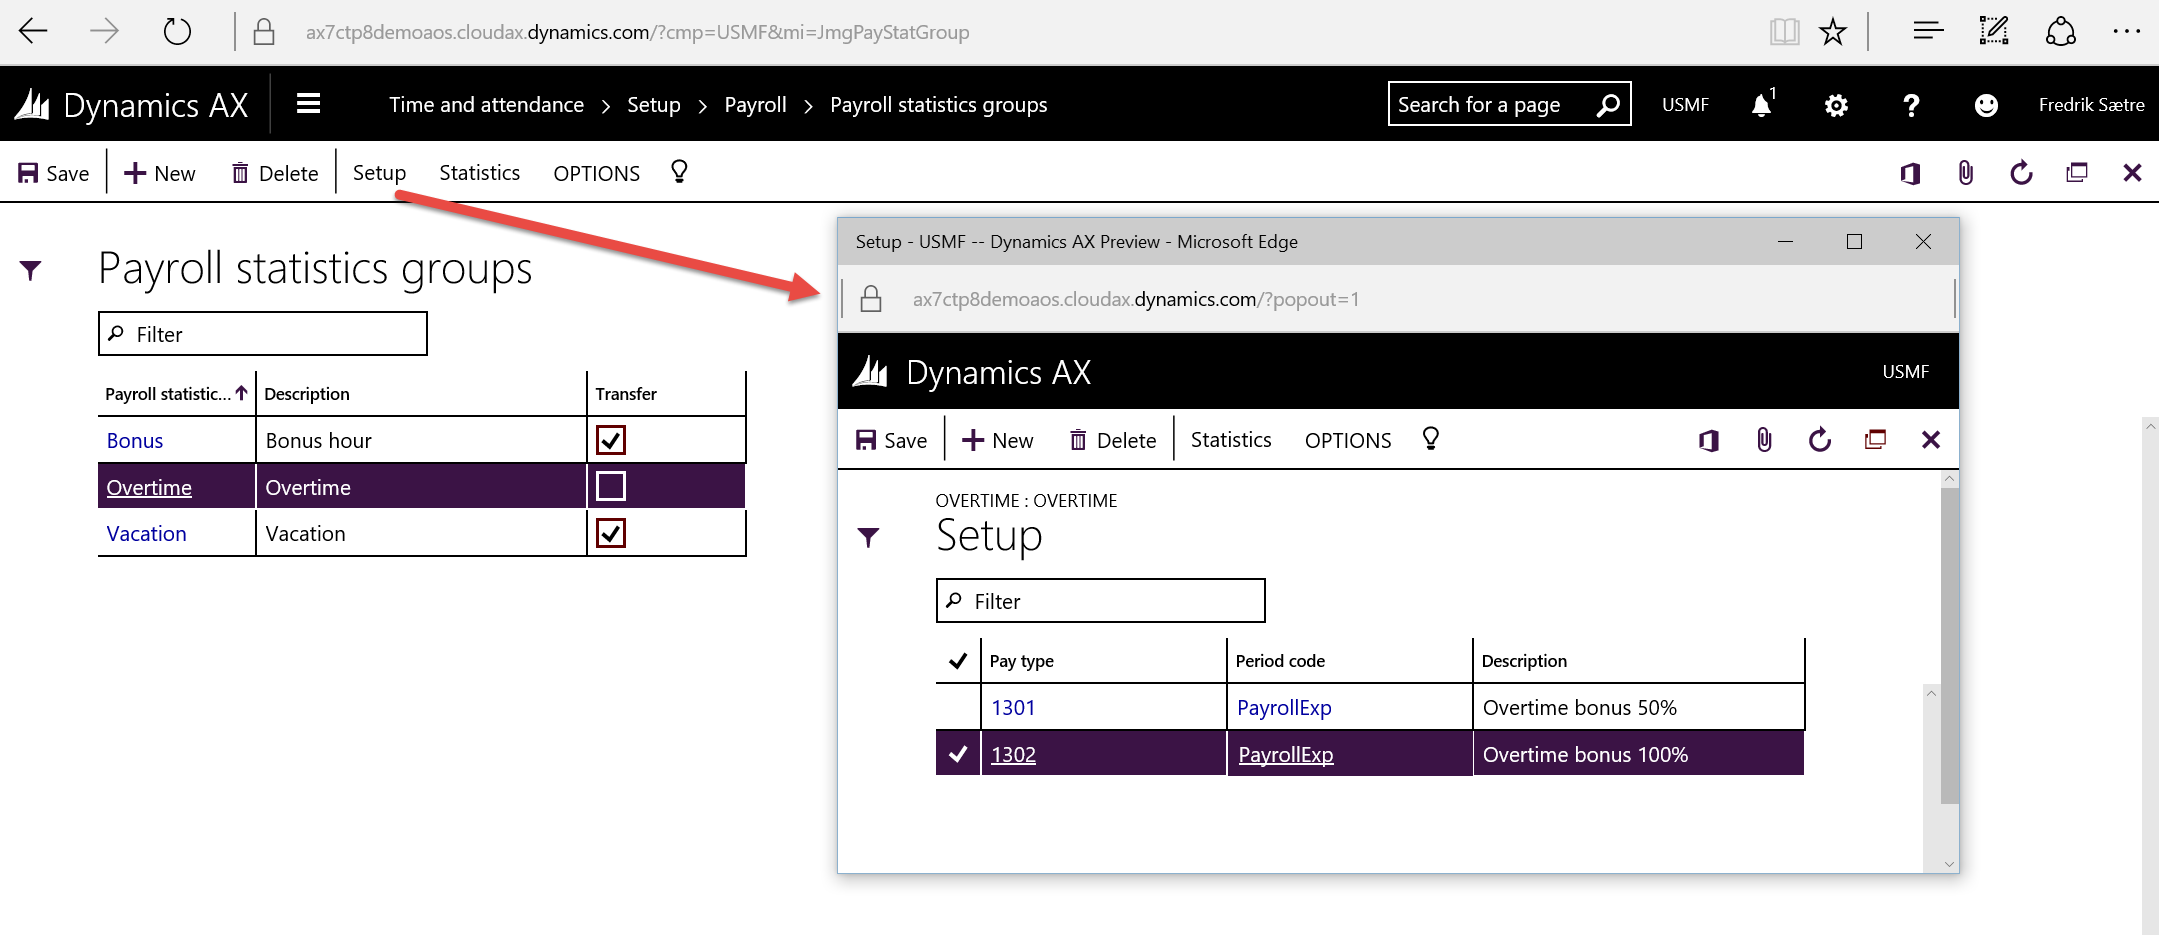
Setup

AX7_UserVendorRelation.png

The person using the Vendor portal has a personal relationship with the solution and is identified as a contact in the Global adresse book.

I presume you know how to create a vendor, so I won’t show you that. It is however important that the user is connected to the right vendors (Yes, plural!) as this is how the records shown will be limited.

To connect a vendor to a contact you simply have to add a relationship to you Global adresse book contact (Common > Global adresse book) and vendor company.

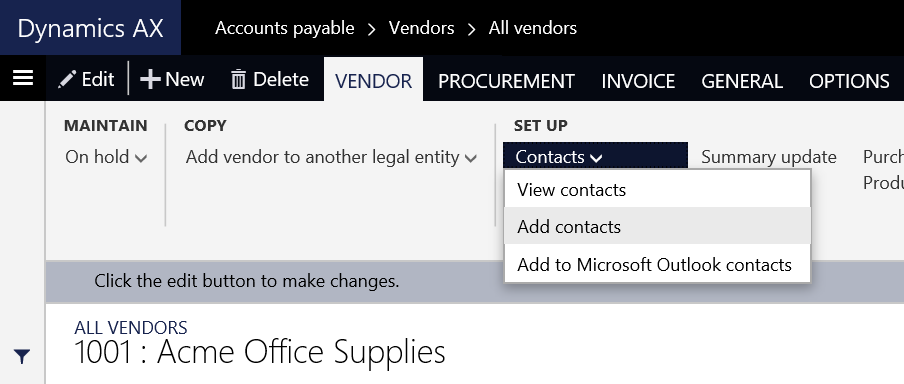
Best way to do this is initially adding the contact from the vendor form like this:

AX7_TA_AddContactToVendor.png

If the person is contact for multiple companies can simply repeat the process in the other companies and select the user from the duplicate check dialogue and selecting to use the same contact record.

AX7_CreateDuplicateContact.png

After the contact has been created you would have to create a user and associate it with this contact.

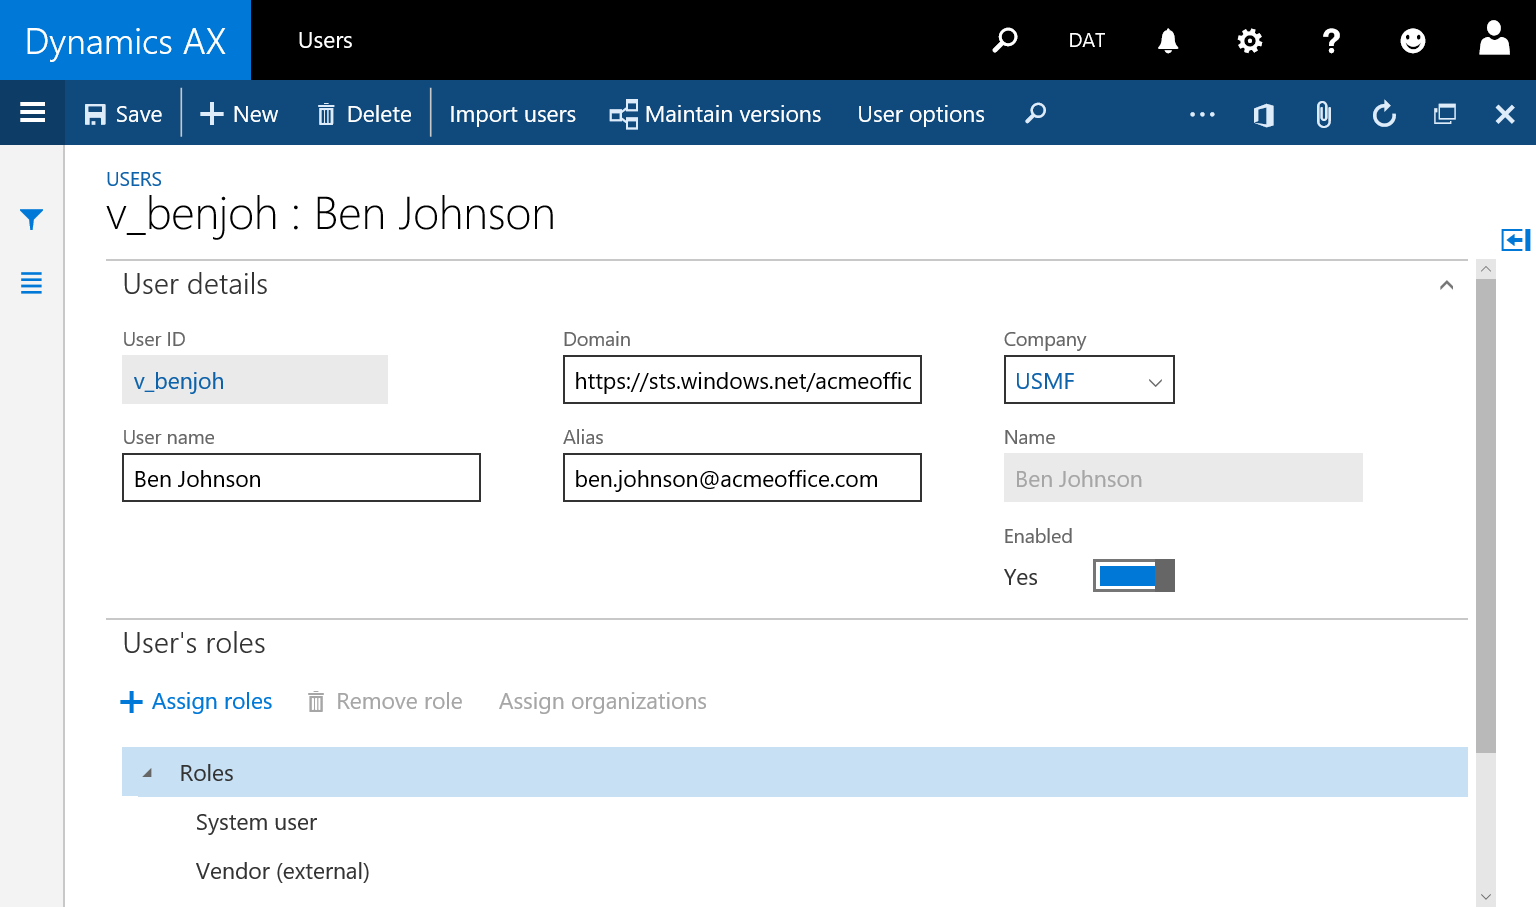
Go to the System administration > Users > Users and add a new user. In the “Name” field you enter the contact person name and add the “Vendor (External)” role to the user.

AX7_TA_AddContactToVendor.png

The limitation to the login is that the user must have a Azure AD account. Many vendors would have this. If they do not have it you can create an account for them in your own domain.

To add an external domain you simply add the domain name in the domain field. It should be a direct reference to the top domain like for  acmeoffice.com  https://sts.windows.net/acmeoffice.com in the domain field.

If it doesn’t work I’ve noticed that for some Office 365 subscriptions the name of the domain can be extrapolated from their SharePoint.com subdomain. For example for acmeoffice.sharepoint.com try the domain: https://sts.windows.net/acmeoffice.onmicrosoft.com
And if it doesn’t work, try contacting the vendors IT department or Microsoft to get the proper domain.

So now you should have a user connected to your ERP solution let us take a look at what features are available.

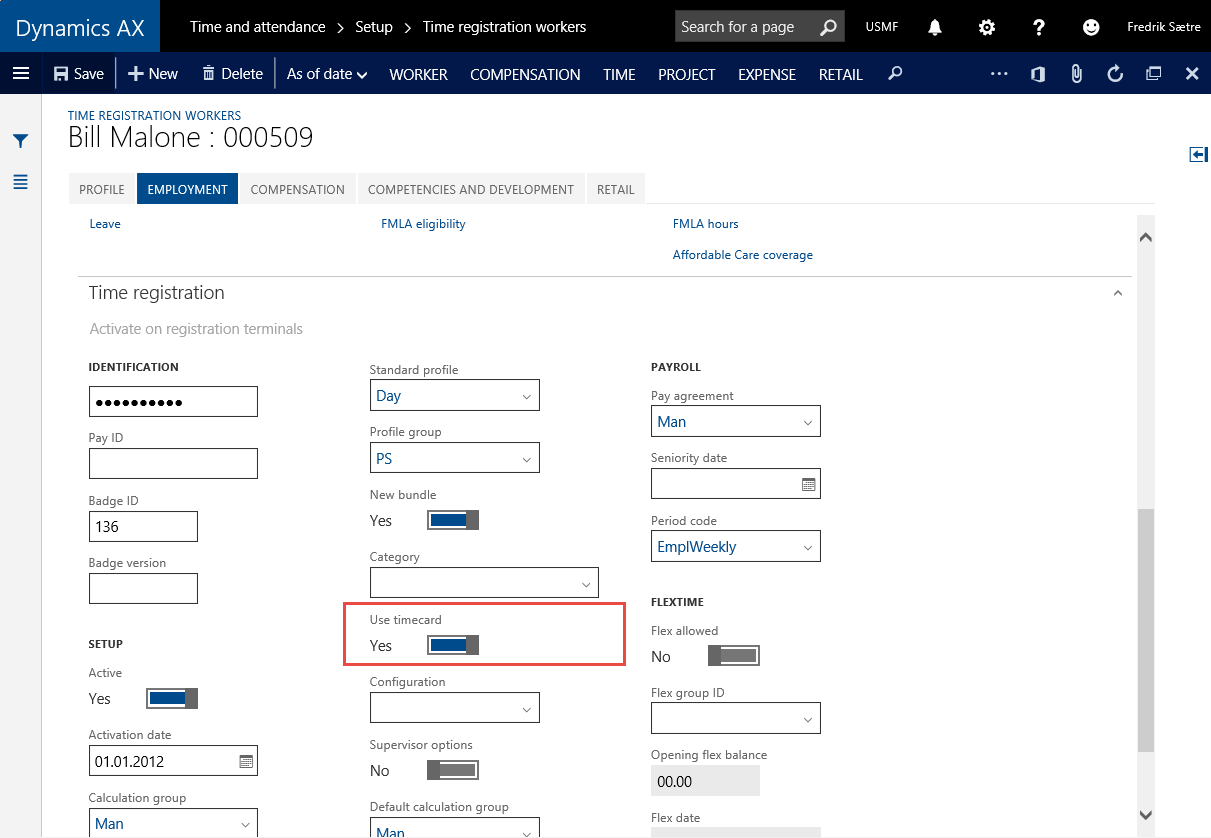
Last step is to activate the vendor account to use the portal features.

AX7_VendPortParm

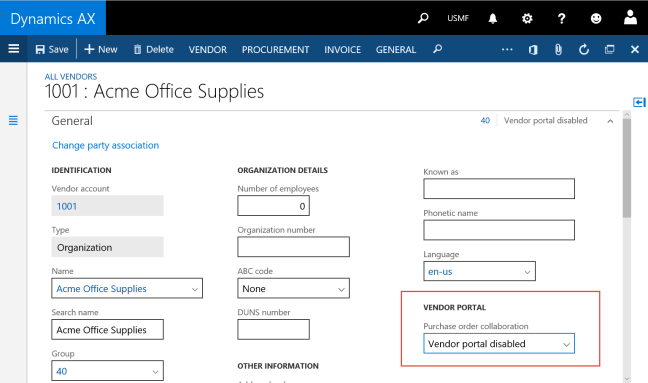
The Purchase order collaboration settings determine how much automation you want in the process. You can set it to be disabled, no auto confirmation and auto confirm. It means that you can get the orders to be automatically confirmed based on the feedback from your vendor or that you must manually confirm them your self based on the feedback.

Features

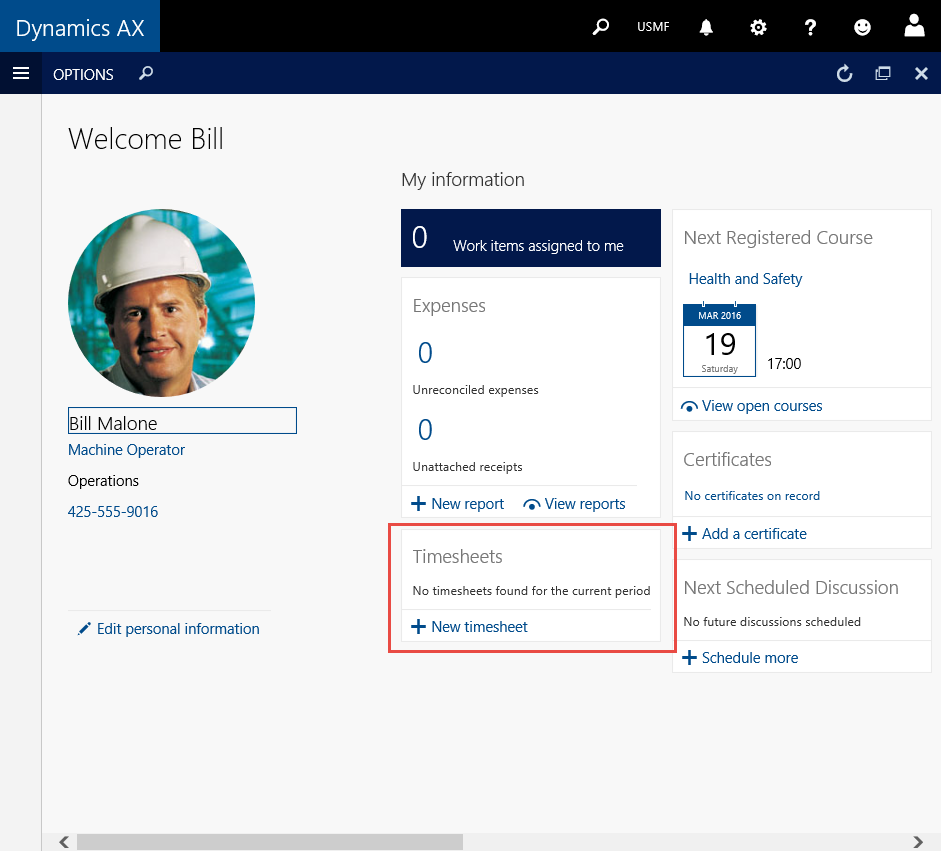
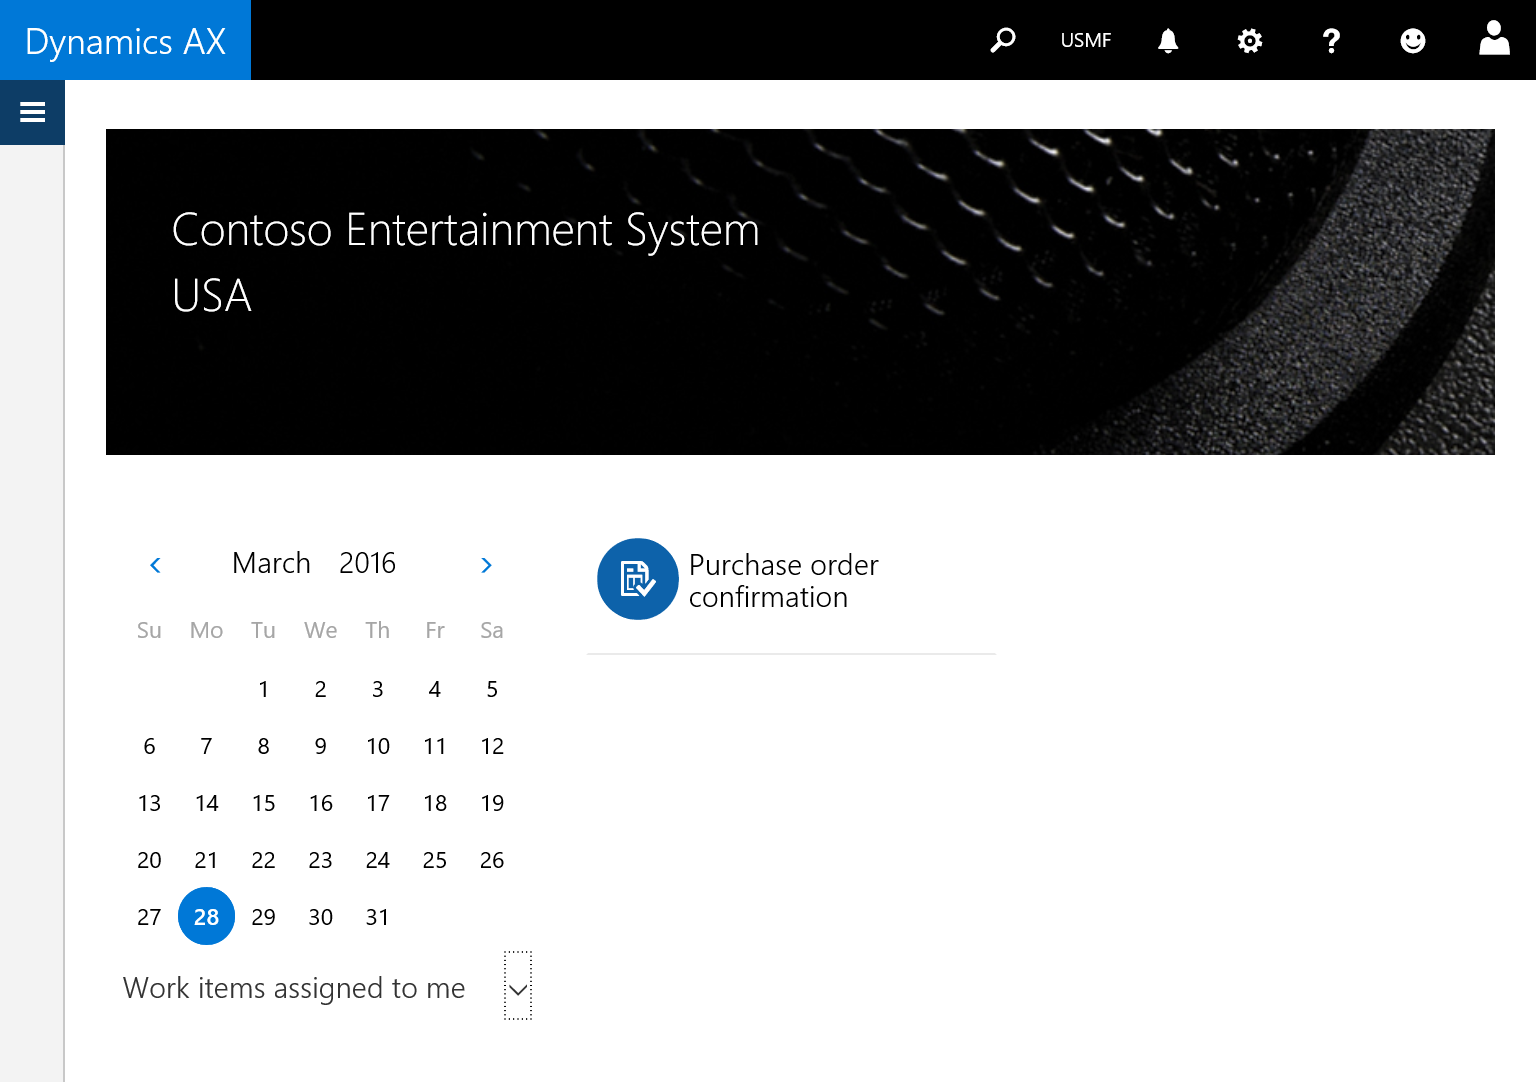
Once it is activated and the user logs on they will be greeted with the default dashboard.

AX7_VendorDashboard.png

Currently there is only one feature and that is Purchase order confirmation, but there will be more functions in the future.

The purchase order confirmation function will let you interact with the vendor by sending purchase order confirmation requests.

AX7_VendorConfirmationRequest.png

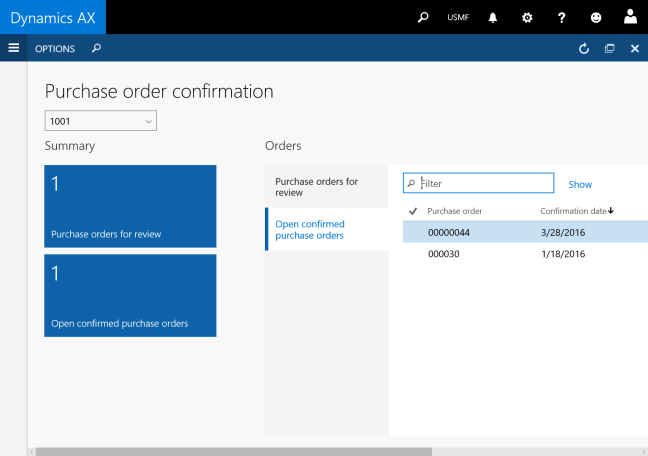
If the vendor contact is associated with multiple vendors they must select the right vendor to view by selecting it in the vendor selector at the top of the work center.

ax7_SelectVendor.png

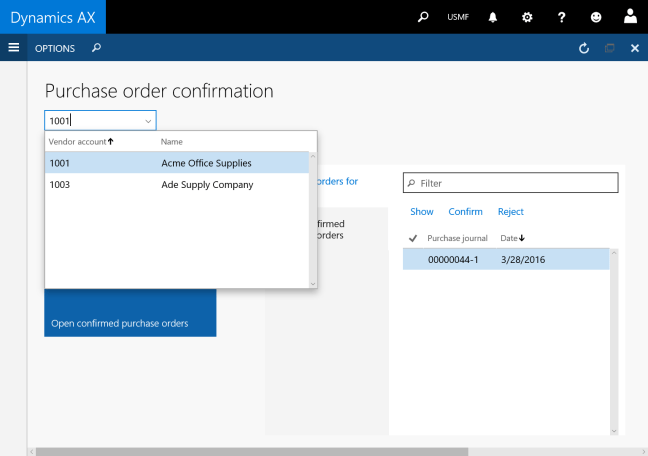
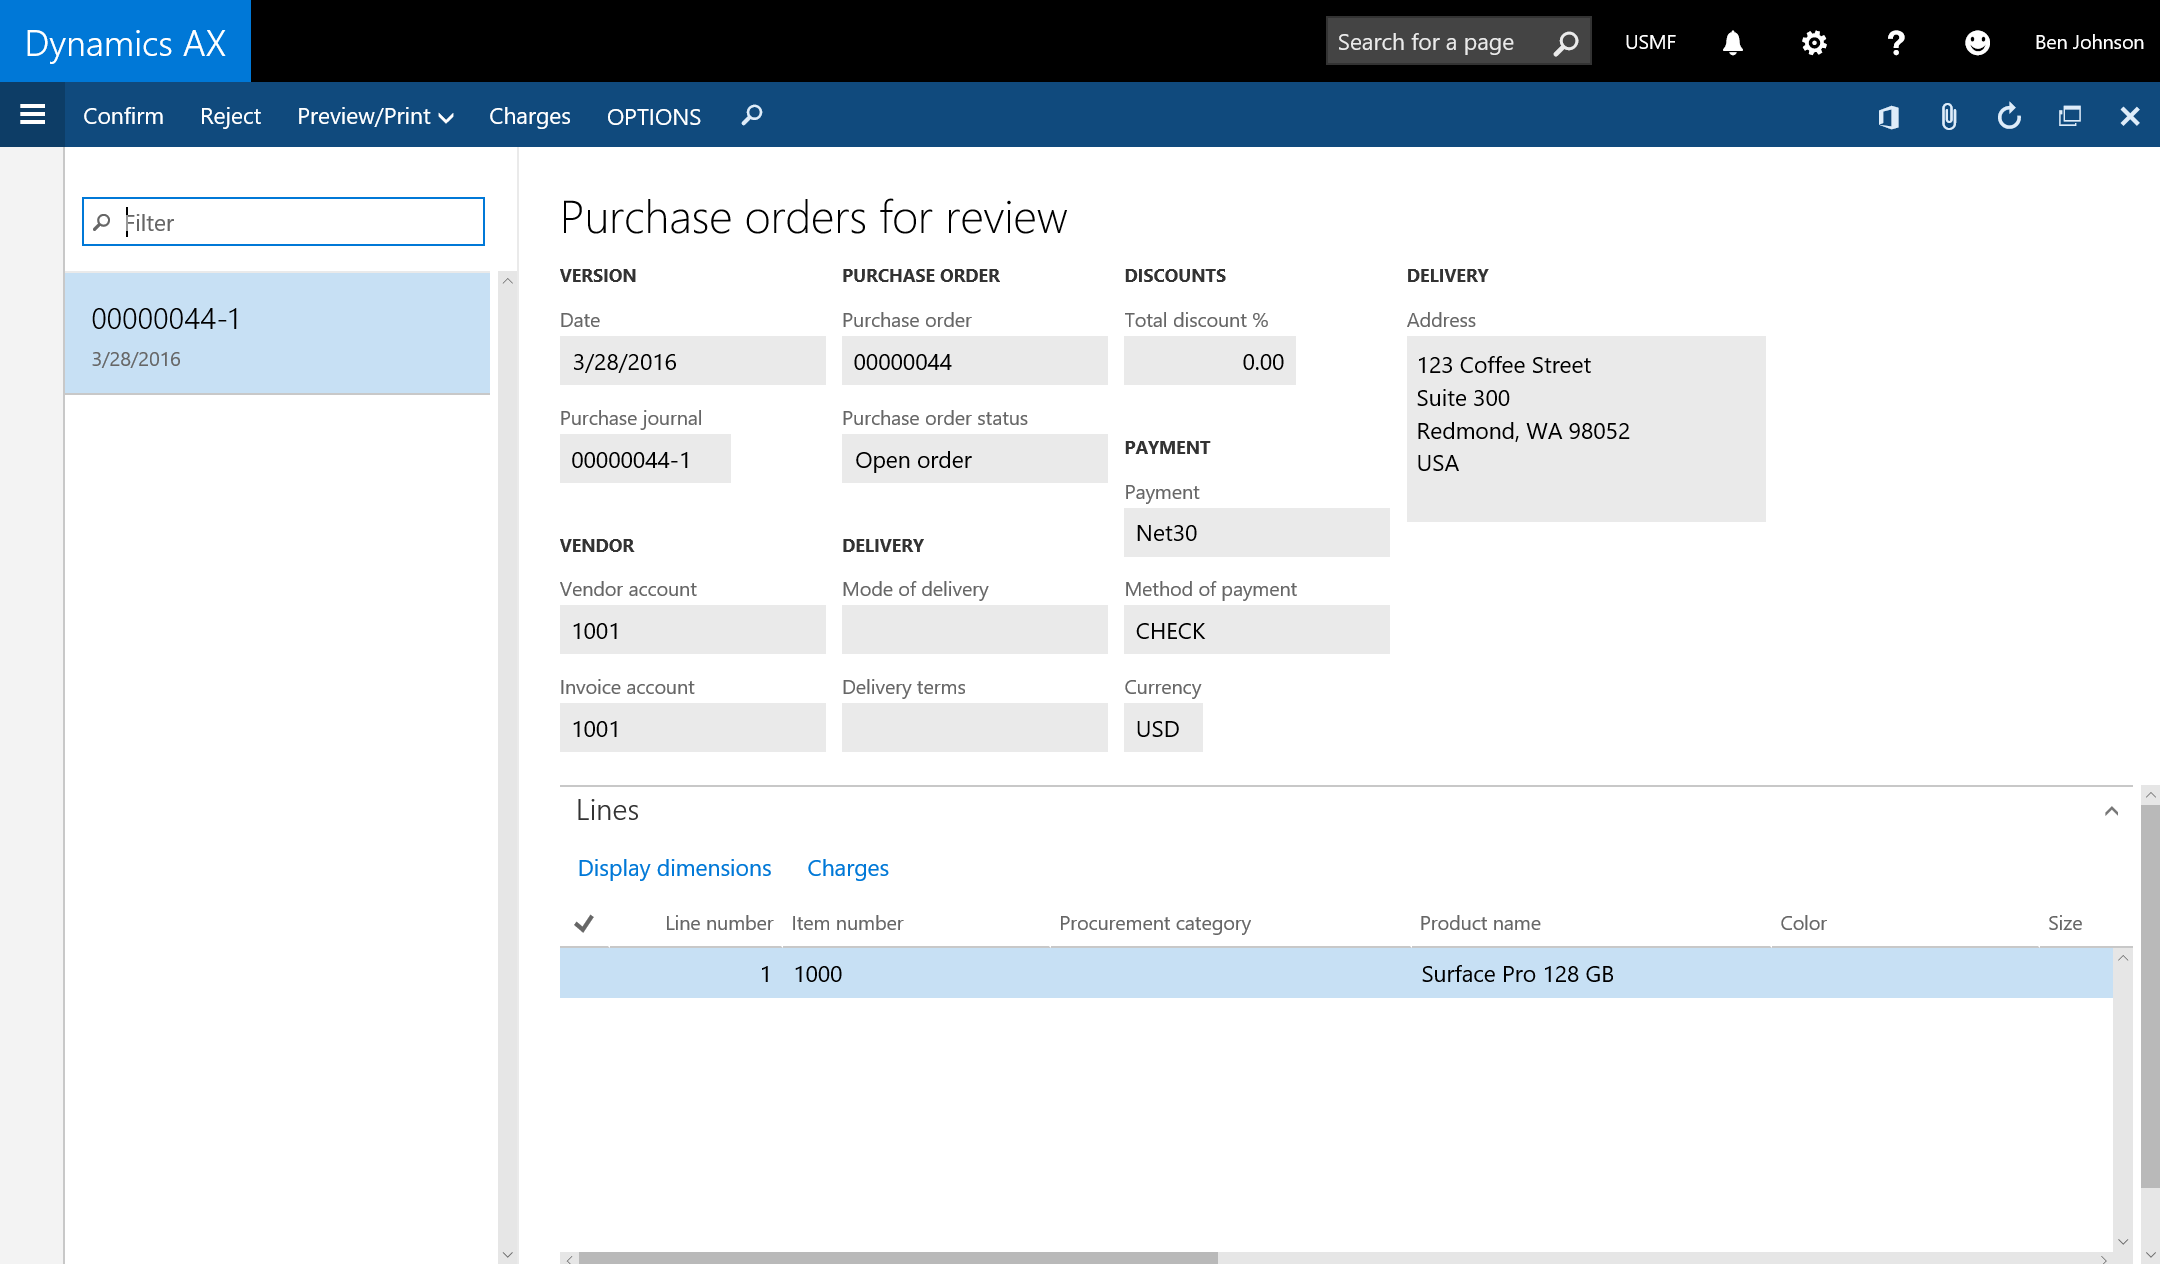
The vendor will see the summary of open confirmed orders and orders that are pending for confirmation request.

AX7_ConfirmPurch1.png

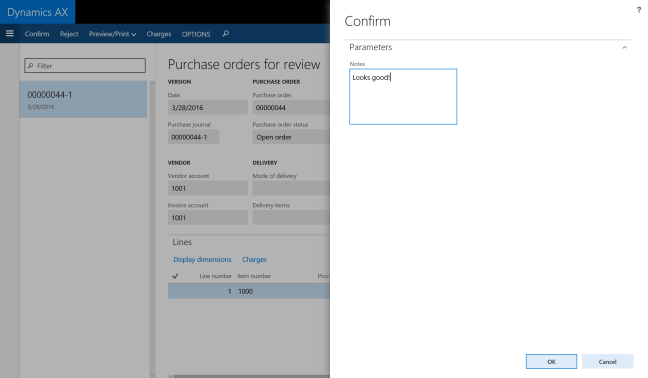
By pressing “Show” in the overview they can get an overview or simply by looking at the overview directly confirm or reject the order.

AX7_ConfirmPurch2.png

After the order is reviewed they can approve or reject the order. A comment can be added to the action.

AX7_ConfirmPurch3.png

The order is placed in the “Open confirmed purchase order” and will stay there until it is received.

AX7_ConfirmPurch

Meanwhile back at the office…

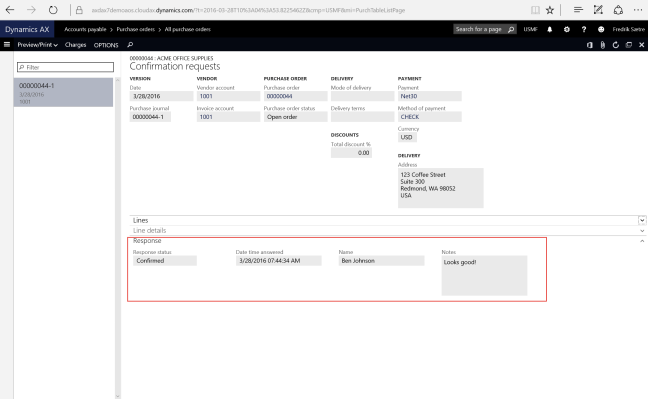
While waiting for feedback the status of the purchase order will be “In external review” and when confirmed it will get the status “Confirmed”. Confirmation also is automatically posted.

When the order is rejected the status for the purchase order still be “In external review”, but have the order type of “canceled” as well. The purchasing agent can the control the comment made by the vendor by checking the Confirmation request journals that is found on the Purchase pane on the Purchase order.

AX7_VendorFeedback.png

If rejected, the agent will update and send a new confirmation request or request the order to a new supplier either on the same order on a new purchase order. The existing order does not have to be updated as the order is of type: Canceled.

You can send multiple requests and the journal entries works as a logg.


That covers the existing feature today. I’m looking forward to the next update to see what has been added.


AX7 T&A: Document groups

When working on the Job card terminal or Job card device you are able to access attachments to the orders you’re working on. This is done by clicking the attachment button/menu item.

AX7_TA_DocGroupJCTAttachment
Job card terminal attachments button.
AX7_TA_DocGroupJCDAttachment.png
Job card device Attachment/Instructions button

This is done by configuring the Document Groups (Production Control > Setup > Document Groups).

Simply add a new record, select the document types and add the users who will view the different documents.

AX7_TA_DocumentGroups
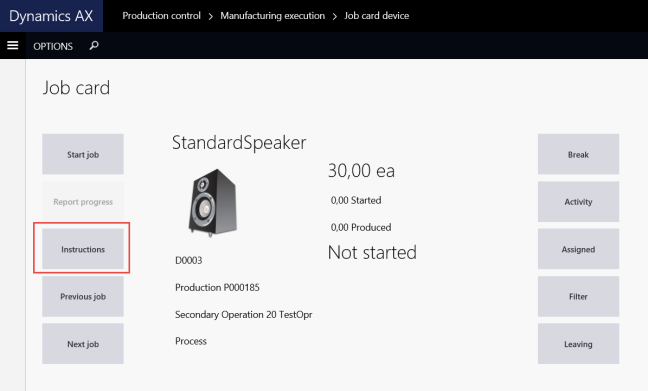
You might want to create different Document groups for different individuals if they are supposed to read different instructions or documents.

Selecting “Reading required” in the document types section will prompt the user with a dialogue when starting the production.

All done!

The system will now look on the production order as well as on the item to aggregate the attachments!

When opening the attachments in the job card forms you will get this nice view:

AX7_TA_DocGroupJCDDialogue.png
Attachment lookup with preview! Looks nice!


Go to the AX 7 – Time and Attendance guide page

AX7 T&A: Teams and assistant

In a dynamic factory setting where human resources go back and forth between different jobs, roles and machines it is important to track each resource to get a good overview of the costing. Some times people go around helping each other on tasks and also work as a team throughout the entire day or for a longer period of time.

When many workers work together on multiple production orders within a period, you can task one of the persons to be responsible to register time for all users. This is done by creating a “team”.

Creating a team

In a team you have the pilot and the team members. The pilot is responsible for the terminal registrations for all the team members. This is done by simply changing jobs as usual. The team members use the “assistance” functionality to join a team. Simply click Assistant and select another signed in worker to start a team.

AX7_TA_JobCardTerminalAssistance.png


Managing your team

An overview of current teams can be shown in the Teams form (Time and attendance > Inquiries and reports > Teams)

Teams can not be “nested”, meaning that a team can not be a part of another team. Not because of the functionality. The tree view is clearly there to illustrate a multi level hierarchy. There just isn’t any way for a team pilot to assist another team pilot. You would have to hack it to do so, and then I don’t know what happens to cost calculations.

The team pilot, Bill Malone in the example above, will change jobs and the cost of the team members (Dana and Christina) will be assigned to the jobs that the pilot is working on.

Before the pilot checks out for the day, and still is pilot, he will get a message saying he has to change pilot before checking out.

The pilot then uses the “Assistant” function as well, but since he/she is a pilot, the menu will say: Change pilot.

AX7_TA_JobCardTerminalChangePilot.png

After selecting one of the team members to be pilot, the user will be demoted to team member. A dialogue shows to confirm this.


Setup: System jobs needed

If you try to work with assistance and you get a message about missing jobs, it is because your system is not ready.

AX7_TA_AssistanceError.png

Go to the Indirect Activities (Time and attendance > Setup > Indirect Activity Categories), enter the “System” group and add the required jobs like this:

AX7_TA_ChangePilotJob

Add jobs for the following system functions:

  • Start assistance
  • Stop assistance
  • Change pilot

Remember to check the “registration” to be able to use it in time and attendance.

Smart use of this feature for shifts/hand off

A smart way to use this feature is if you have a resource that handles many jobs at once and do a shift change. I have a customer that has a production line where many (40-100) jobs can be active at once from about 1000 released jobs.

Instead of the shift coming on has to register to all the jobs and select them from the enormous list of jobs, he/she uses this feature for a hand-off.

This is what you do:

  1. The shift coming on signs in and registers as assistant on the one working on all the jobs.
  2. The shift going home registers the person coming on as pilot and checks out.

The jobs are then handed over. A great time saver.

Go to the AX 7 – Time and Attendance guide page

AX7 T&A: Supervisor options

The idea behind the supervisor option is that the shop floor supervisor shouldn’t have to retreat to their office to do the most frequent tasks. This includes reprioritize work, control worker attendance, report absence and change feedback as well as report on manufacturing execution tasks themselves.

When authenticating on the time and attendance registration form, the supervisor will be prompted with a supervisor dialogue where they can quickly jump to the desired task.

AX7_TA_SupervisorOptions.png

The supervisor can change between different resource, groups and production units to do Job registrations.

Change Feedback

The “Change feedback” option gives an overview for feedback from the selected resources.

AX7_TA_ChangeFeedbackOverview.png

You can select multiple records and click the “Update Feedback” button. This launches the feedback wizard form which I normally don’t use because you can not access the picking list. This is a simple way to perform feedback.

AX7_TA_ChangeFeedback.png

After the supervisor has updated the feedback and clicks “Finish” the journals and jobb is updated.

This is a great feature as it allows the supervisor to reactivate jobs that has been reported as completed, but should have been reported as stopped. Earlier this gave a lot of headache because you would have to go into the AOT to fix it or create a job that could do this for you.

Attendance

The supervisor can quickly access the Attendance form (which you also can do from the terminal directly) from the supervisor options to report absence or check the worker attendance.

After selecting a calculation group,

AX7_TA_AttendanceGroup.png

the supervisor will see the attendance overview.

AX7_TA_AttendanceOverview.png

Here the supervisor can print the attendance form, clock out a selection of workers or register attendance directly.

Clicking on register attendance for a worker the supervisor is presented with a absence registration form with a start/end date and time based on the planned work profile and can input an absence code.

AX7_TA_AttendanceRegisterAbsence.png

This is done without even leaving the shop floor. When the forman is going to calculate the absence registered will be used and he/she won’t be bothered with roaming the workforce to find out who knows why anyone wasn’t clocked in that day.

Edit job list

“Editing job list” is used to reprioritize the sorting of the jobs on the terminal for the resource.

AX7_TA_EditJobList.png

Selecting a job the supervisor can move it up, down or to a specific sequence number. It is also possible to move the work to another resource as long as it is within the route operations requirements.

Making the job High priority will force the resource to work on this job next. It will be the only job that the resource can start working on and will be notified if he/she tries to start another job.

There are also a lot of other information like capacity overviews, materials and general information about the production order and/or job.

Activation

To activate this feature for the terminal user. Go to Human Resources > Workers > Workers | Employment > Time Registration > Supervisor Option and set it to “Yes”.

AX7_TA_EmployeeSupervisor


Go to the AX 7 – Time and Attendance guide page

AX7 T&A: Payroll statistical groups

Payroll employees are continuously hammered with questions like: How many vacation days do I have left? What is my flex account balance? How many overtime hours do I have so far this period? What is the balance of “this” account?
These data are often presented to the worker on the payroll report or payment slip and at that time often spark a debate with a bunch of employees all at once.

Putting continuously updated account balance information in to the hands of the worker is pretty important as it frees up a lot of time for the payroll employees. Some, but not all, of this info is presented as default in the time and attendance (Paytime, Overtime, Absence and flex). However, you may want to present the worker with other account balances, like vacation for instance.
The way you do this is by grouping together different payroll types in to “Payroll statistical groups”.

The Payroll Statistical Group also has other usages like weighing average balances within a period and I’ll go in to that in a later post, but today we’re just looking at showing balances to end users.

It is a set of accounts that you group together to show a balance, and you can choose if it should show only for the current period (Paytime, Overtime, Bonus that are paid regularly) or the total account balance (Flex and Vacation). The groups are then presented to the worker in a list that you can access in the time and attendance registration form called “Balance”.

AX7_TA_JobCardTerminalBalancesMenuItem.png

Note: The flex account and overtime are displayed in the users status window, but can also be added to this list. Also on the balance overview list you’ll find your standard payment

AX7_TA_JobCardTerminalBalances.png

To set this up you must first set up the entity that group your accounts for a summed balance. Go to Human Resources > Setup > Time and attendance > Payroll > Payroll Statistics.

Create the summary groups for your accounts. “Transfer” means that the account balance for previous periods are accumulated in the view.

AX7_TA_PayrollStatGroup.png

Go to “Setup” and add your accounts.

AX7_TA_PayrollStatGroupSetup.png

Now choose what balances you want the workers to view in the time and attendance registration form in Statistical balance setup (Time and attendance > Setup > Payroll > Statistical balance setup)

AX7_TA_StatisticalBalanceSetup.png

That is it! Now you can present any kind of account balances to an employee and ease off many questions to the HR/payroll department.

Go to the AX 7 – Time and Attendance guide page

Icons and symbols in Dynamics AX

wp_ss_20160324_0001 (2).png
A small selection of the icons available

AX 2012 had a wide variety of icons. The ribbon bar is literary littered with them. In the next version there are almost no icons, but you have probably noticed that there are some here and there. It is solved by using a special Dynamics AX Symbol font.


There are clear best practice guidelines on how to use these and I urge you to follow them, and if you’re in to functional and form design you should be aware. There is a document listing all the different icons and give you the guidelines to use them:

Read this whitepaper on the Dynamics Symbol Font!

You can also contact the Symbols team if you want to add additional icons. Read about it the document.