
The timesheet solution is a part of the Project management and accounting module and is not integrated with Time and attendance. It is the best way of posting manual feedback about hour transactions to projects and project activities. This is often used in combination with time and attendance time stamp, but be carefull to not register time on the time registration terminals to projects when you do so as that will cause duplicate postings to project.
The users normally access the timesheets through the Employee self services, but ut can also be accessed through the Project management and accounting > Timesheets > My timesheets menu item.
Setting up the user
To make a user be able to access their time cards from the Employee self services workspace you first have to assign the user the Employee role and add a calendar to the employee: Human resources > Workers > Workers | Employement > Employement details > Calendar
You also have to add the desired period code to the users profile to set the range of the timesheets. This is done by clicking the Project pane and selecting “Project Setup”.

This opens up a form to handle the setup for project related to this employee. You at least have to fill out the Period Code field, but there are some other fields that can be configured as well to handle the project timesheet.

Setting up period codes
A timesheet is a set of days grouped by the Period type (Period code), so before we begin we have to set up these.
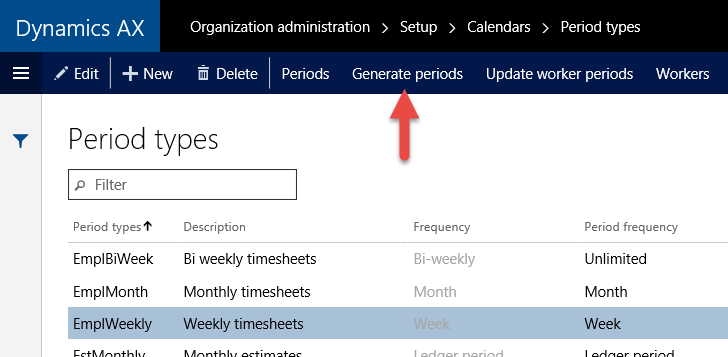
You can set up period types by going to Organization administration > Setup > Calendars > Period types or drilling through on the worker setup form.

You can define your different period types like Weekly, Bi-Weekly, Monthly and so on and add these to the users like shown before.
After the period code has been created and added to the workers you have to create the timesheets. This is done by clicking “Generate periods” on the Period Types form.
The dialogue that pops up gives you the possibility to create the given period for x number of periods from what date. Remember to set “Update timesheet periods” to Yes as this will create the timesheet periods in the same process. You can do it afterwards if you mess up by clicking the menu item for this in the same form.

You can then review the timesheets by clicking the “Show timesheet periods”.

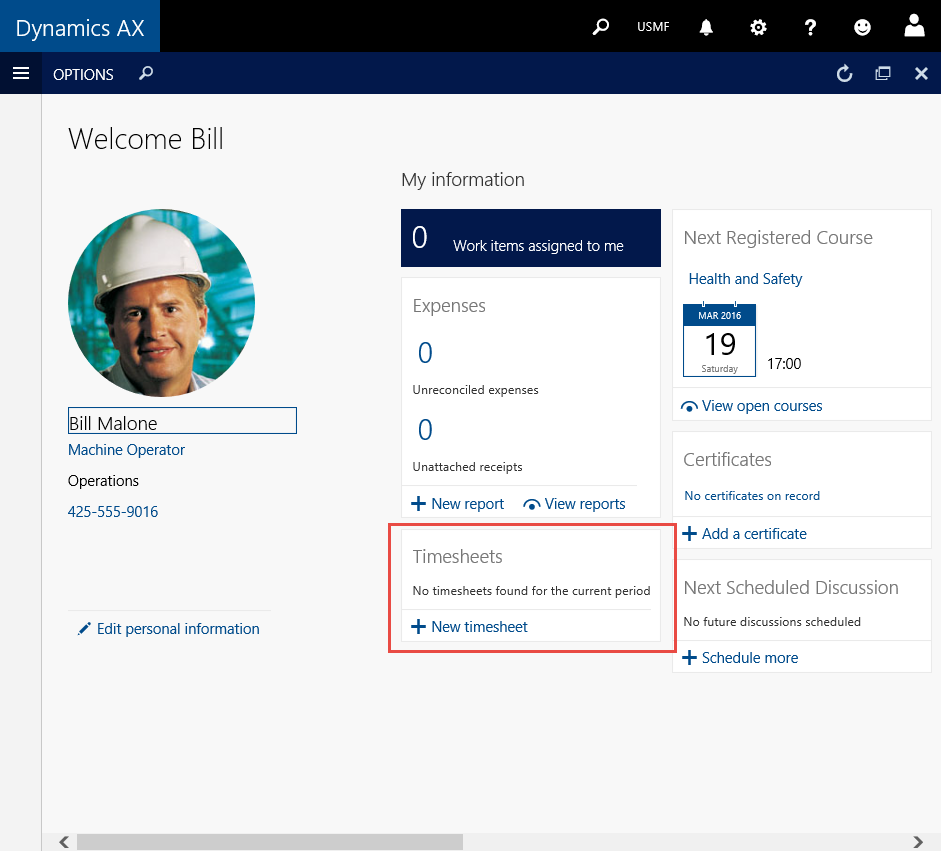
Ready to use!
So after you’ve created the Timesheet period, related an employee to use this period for projects and then activated the “Use timecard” on the worker, you’re good to go.
To open the form you can go to the Employee self services workspace and click the “New timesheet”.
This opens a dialogue where the user can specify for what day he/she want to input data for. The timesheet period for this date is then selected.
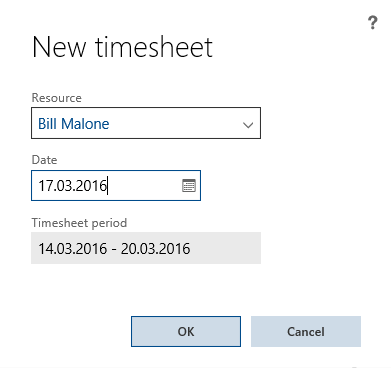
Then you’re ready to start filling out timesheets!


Thanks for this great tip Fredrik. Do you know by any chance whether there is a successor for the timesheet app that comes with AX2012. How do user fill in timesheets in a mobile device with the new AX?
Hi Harold,
Long time no see!
Not sure, but I would believe that the companion app could work against AX7 as well. I will look in to it, but the general strategy of AX7 will be Power Apps.
Although as far as I know, Microsoft is still running with strategy of having a cross platform application available for timesheets even thou it is available in web.
Very clear post thank you Fredrick.
I noticed i can be usefull to specify that the path to set up the Calendar would rather be on the Employee or Contractor:
instead of Human resources > Workers > Workers | Employement > Employement details > Calendar
on my instances it is Human Ressources> EMPLOYEES ( or CONTRACTOR)> TAB EMPLOYMENT> Calendar.
Just in case people look for it 🙂
Thanks for the input, I’ll make sure to update it shortly.