

The concept of Electronic timecards are used to manually enter time or change your existing time journals based on your terminal registrations. The form is rather detailed and does require some end-user training, but it is a very powerfull tool for self service work. There is an alternative to Electronic timecards in the Project management and accounting module called Timesheets. The timesheets are much easier to use and require less input from the user.
For project workers only doing registration of time to projects and still want to use time and attendance, I would recommend using a combination of the two. Just be aware that you can register time on a terminal AND do timesheets that will lead to duplicate data. So if you use a combination, then make sure you’re not checked in to a project on the time and attendance terminals.
For manufacturing workers it is nice to let them enter this form to confirmed or change time registered before it is reviewed by the forman.
Activating a user
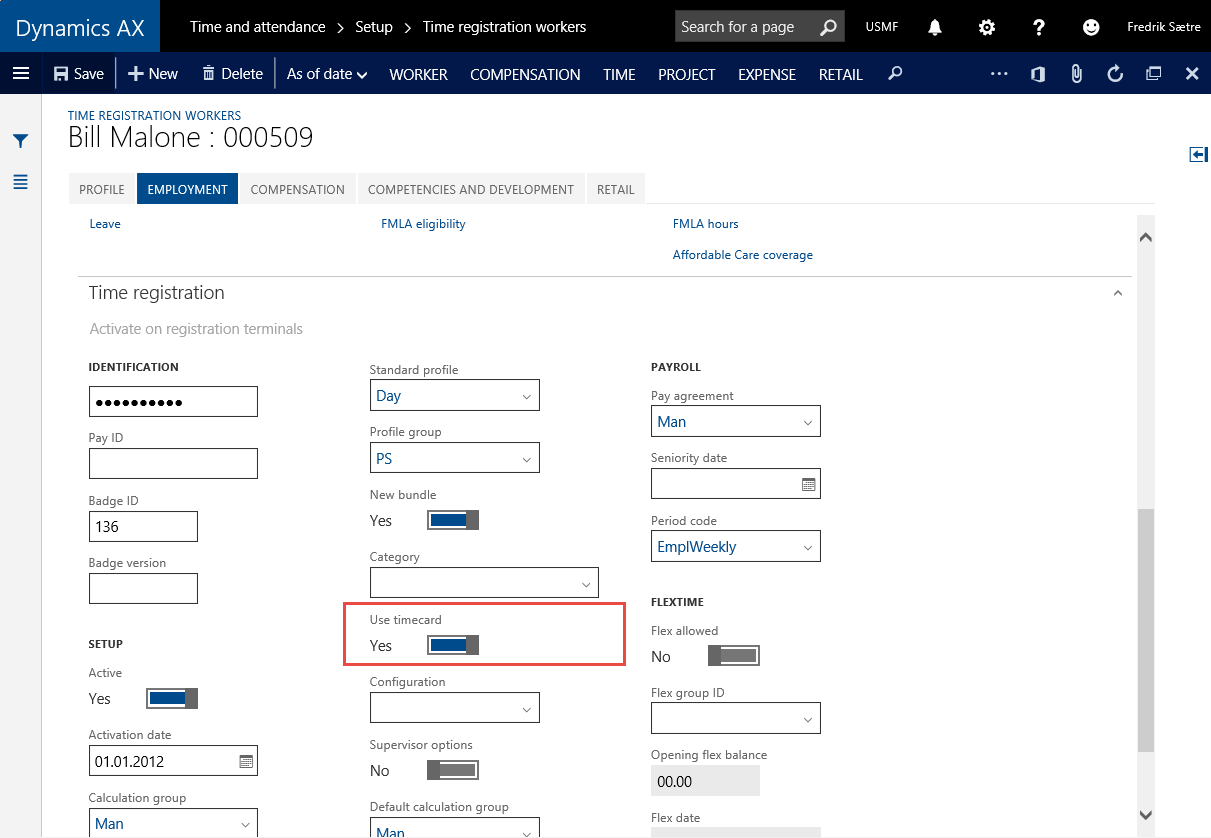
On the Worker simply activate the “Use timecard” parameter.
The user will now be able to input Electronic timecards by going to Common > Common > Time and attendance > Electronic timecard.
Once this is registered, any user can access this timecard. I therefore recommend using passwords on these users to preserve some type of security.
The user has to select the right user from the dialogue and is then presented with the Electronic timecard.
To open the electronic time card. Go to: Common > Common > Time and attendance > Electronic timecards. When opening the form the user has to identify the user. The system suggests the current logged in user, but he/she can select another user is need be.

The form is opened for the selected user on the current date.

The list will be populated by the terminal registrations if there are any registered.
Locked or unlocked?
The form can be locked to a specific user. You can not edit the lines without locking it. This is to ensure that only one user is editing at the same time. Click the “Lock” button before you start to edit.

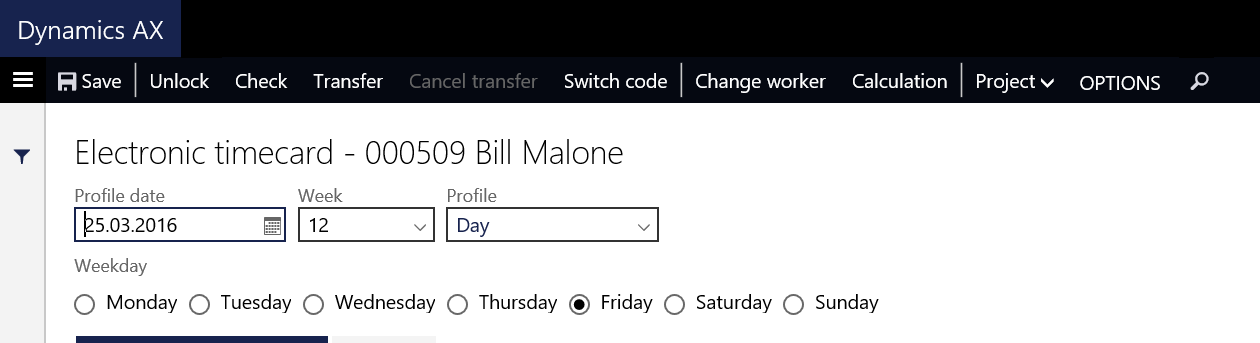
Find the right day and time profile
The Electronic timecard form is opened on todays date and it is easy to select another day for the week selected by clicking the weekday name radio buttons.

The profile is based on the users proposed time profile, but the user can change it if need be. This is often used if the worker has worked a different shift then is planned.
Entering and/or changing transactions
There are a lot of different types of time registration types to select from.
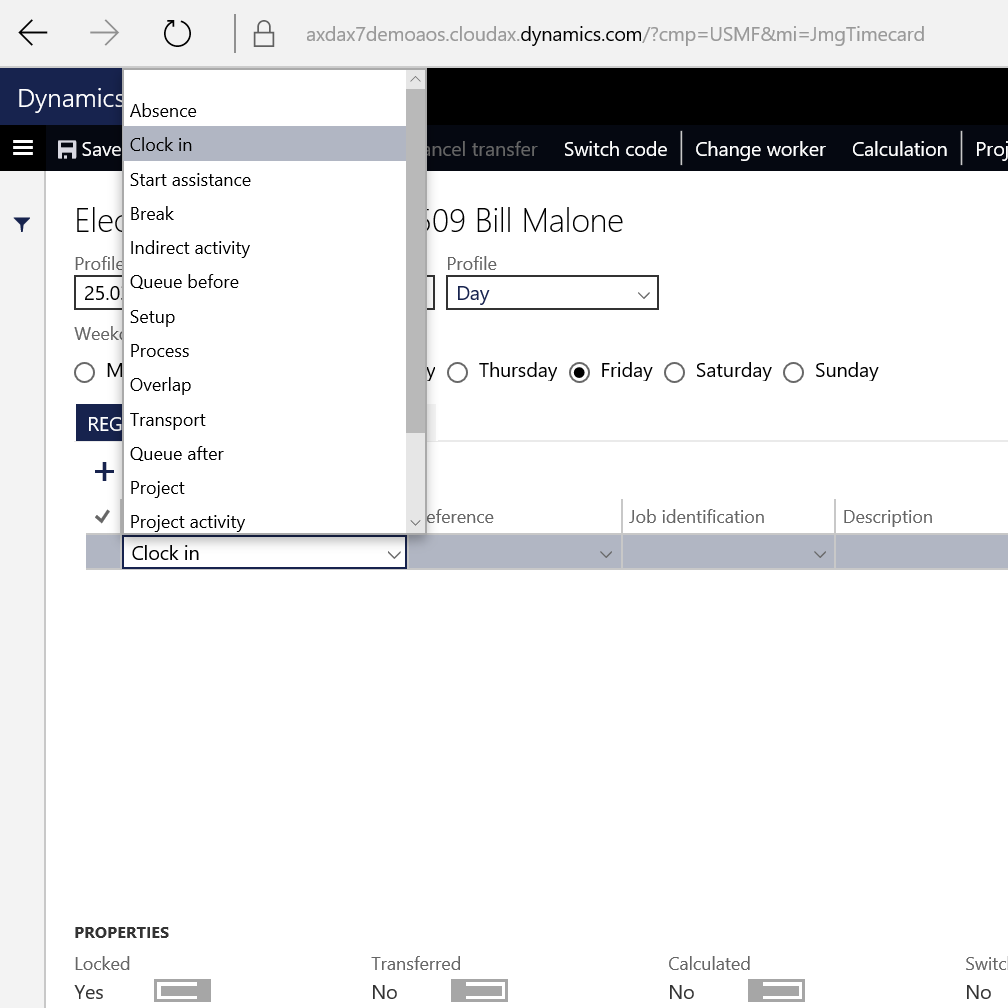
The Clock in and Clock out types does not require the user to select any job. In these cases selecting the type and then start time is sufficient.

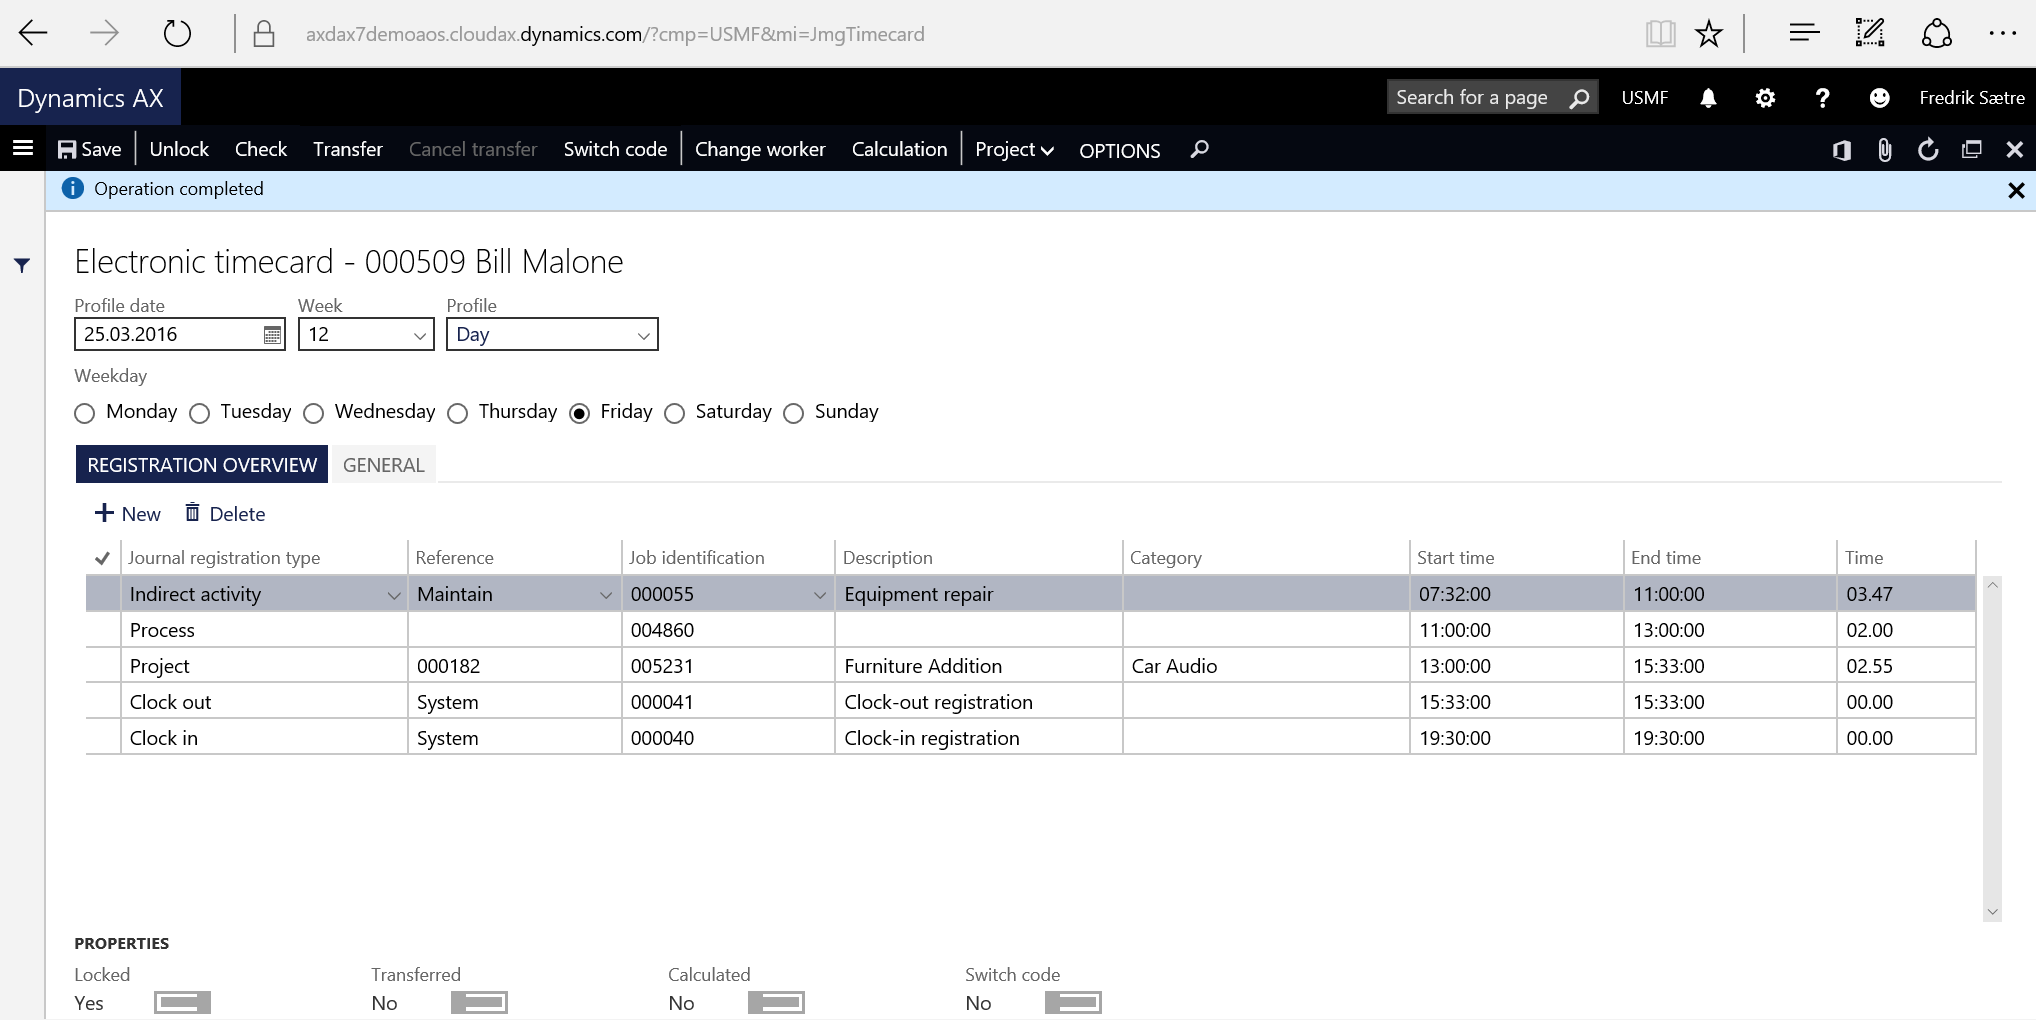
The other type of transactions require the user to select a job. The “Journal registration type” and “Reference” fields can be used to limit the selection in the Job identification selection, but it is not required. So you only need to enter the Job ID.
On project transactions that are manually entered the Category must be filled out and is defaulted to what is set on the workers time and attendance settings.
To enter switch codes you click the “Switch code” menu item. These are not added as lines in the form. Read more on switch codes here.
Check and transfer
Once the form is complete, the user can “Check” the timecard registrations done.
Clicking the check function opens this dialogue.

If for instance you have a errors in the lines you will get errors in the message center.

Multiple errors might be the result of only one mistake in the lines, like this example. The clock in is sat to late. Changing this to the right time will remove all errors.

Once the transactions are checked with no errors, the worker can transfer. You can not transfer with errors, so it is sufficient to click the Transfer button. This will also execute the “Check”.

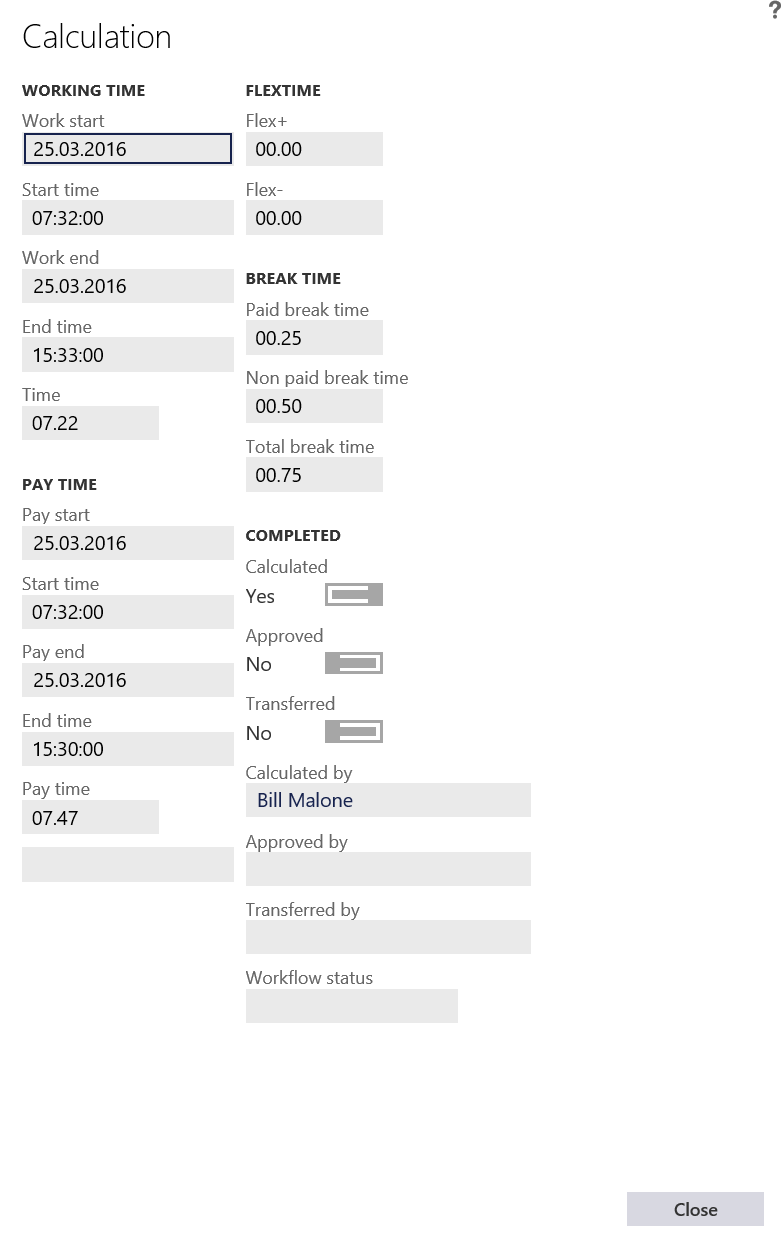
Calculation
After the forman or team leader has done the calculation the sums for the day are created and the user can control these. In the Properties, at the bottom of the form, you will see if the day is calculated or not.

Once calculated the Electronic timecard can not be changed. The sum of the day can be viewed by clicking Calculation in the form menu.
Go to the AX 7 – Time and Attendance guide page

One thought on “AX7 T&A: Electronic Timecards”