AX7 T&A: Basic concepts

It might be hard to get an overview on how the module works, so I made this chart that I feel pretty well illustrates the process and flow of the module in general.

Concept2

When doing training I feel that this is a great point to start.
An alternative view is this top down approach with a little more detail.

concept3

Data input:
Time and attendance uses jobs to that is registered in raw registrations at the time of input from the user. It creates multiple jobs for each production operation depending on the settings, a job for each project and project activity, a job for each indirect activity and absence code and absence group.

Calculating work times:
When the person doing the calculation/approval opens the profile day for control of the hours the system creates the time journal header and time journal transactions based on the raw registrations. The journal can be changed. It can also be reverted back to it’s original transactions by importing the raw registration transactions again. The system require absence to be identified at calculation.

Calculating parameters and Pay agreements:
The pay agreements are used to set the base for what pay types that will be generated.
After the work times are calculated and approved it runs through the calculation parameters where the profile types corresponding with the raw registrations generate pay agreement types based on the calculation parameter settings and pay agreements.

AX7_TA_CalculationParameters.png

Transfer:
After calculating and approving the user will transfer the journals. This results in the lines being removed from the view of the user and pay types being locked in. These can later be exported to an external payroll system and the pay type transactions will be flagged as exported.

At the time of transfer the production orders and projects will get hours amended in the time journals posted as discrepancies in new route cards/Job Cards and Hour journals.

That should cover the basics!

Go to the AX 7 – Time and Attendance guide page

AX7 T&A: General Parameters

There are a lot of parameters, but I’ll focus on the ones you mostly need to take in to account early on. We’ll get in to the different parameters later, but the default parameters are pretty OK.

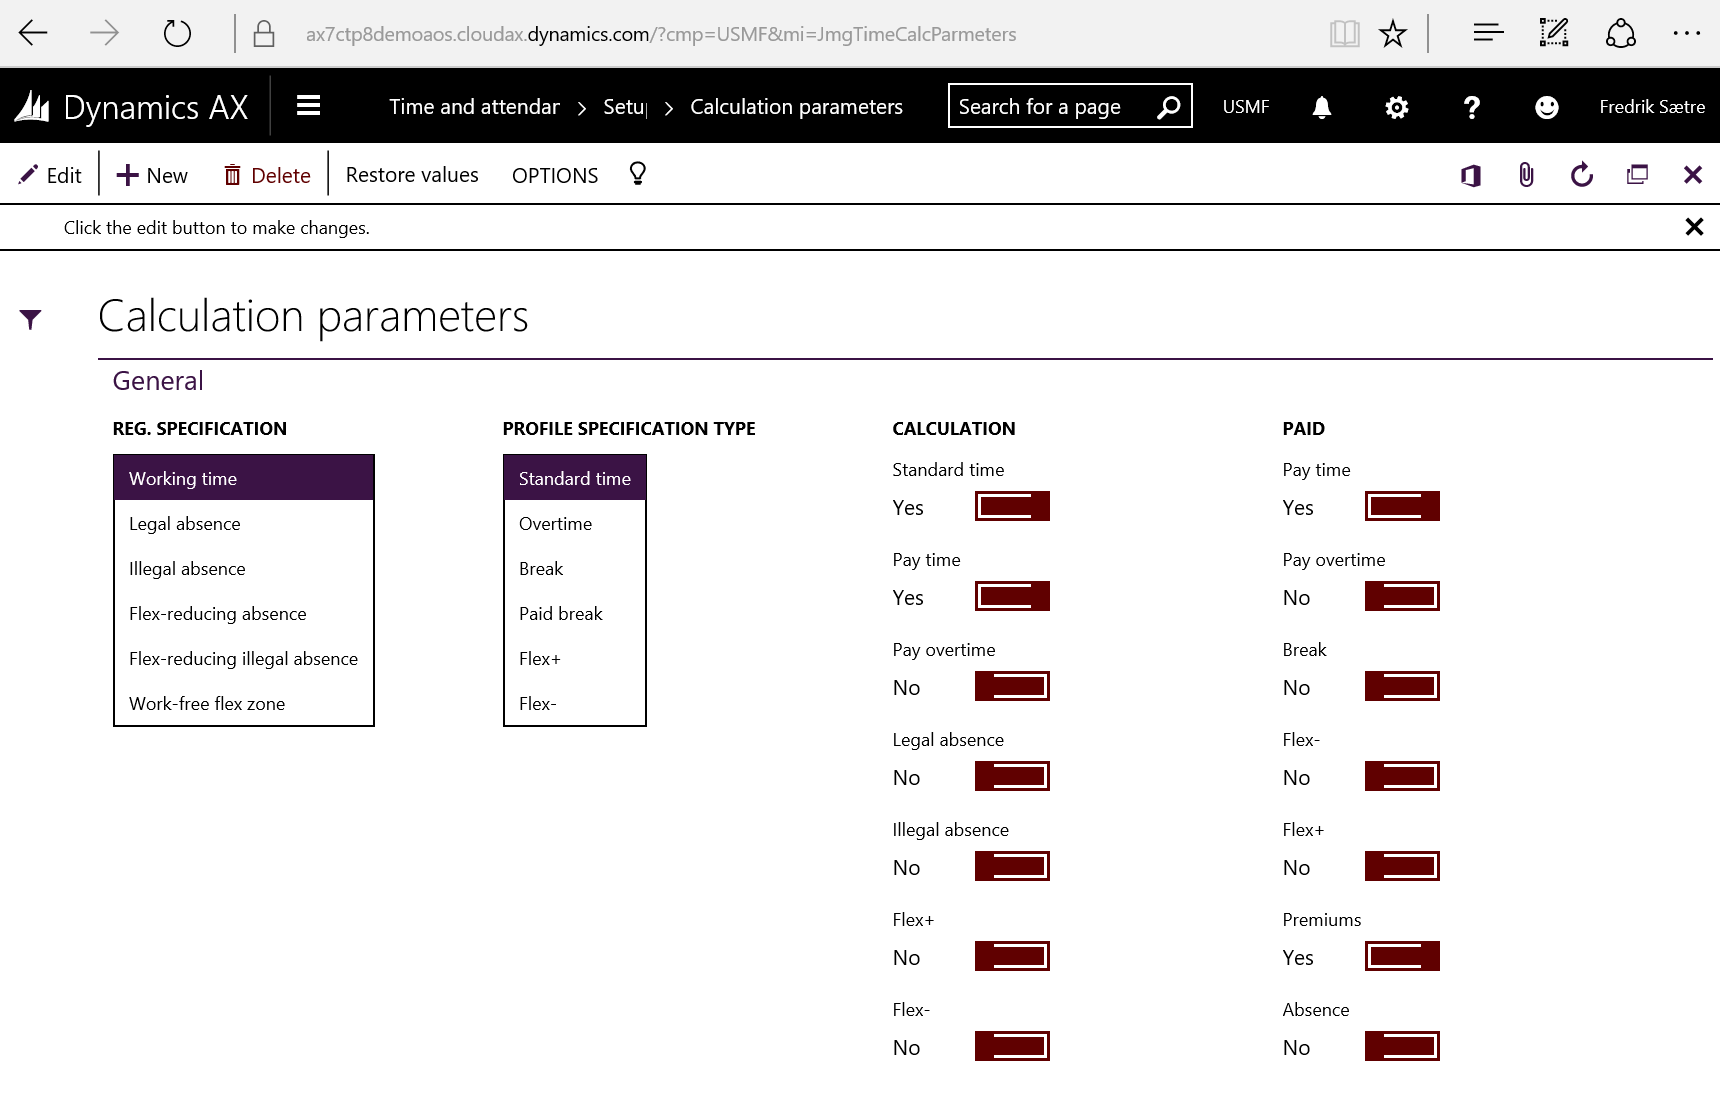
No surprise. The general parameters are located at: Time and Attendance > Setup > Time and Attendance Parameters.

AX7_TA_Parameters1

I most often keep “Auto insert flex-/absence” blank. If not you will automatically get an absence suggested when approving hours. You would probably want to allocate this and be alerted when absence is registered.

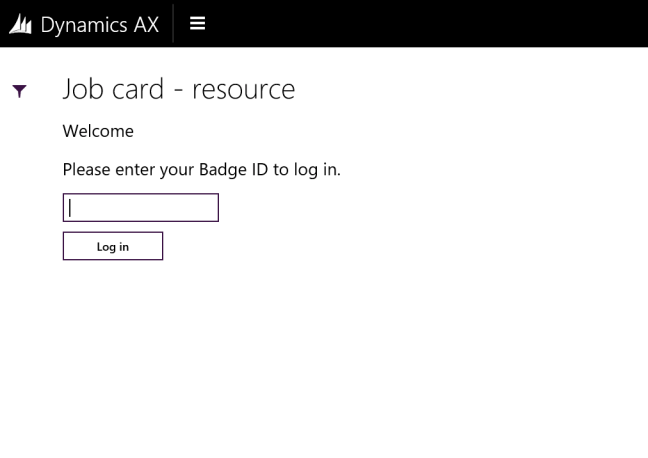
I seldom “Use password”. This is a security feature giving you an extra box in the check in dialogue. It is a field on the worker setup. Leaving it blank lets you only require the user ID. I have a customer where the factory floor workers only authenticate with a barcode ID (no password) and the administration use ID + Password.

I often “Use badge ID” because most companies don’t have a good number sequence on the employee numbers. This requires you to add an ID to the Badge ID field on the worker setup.

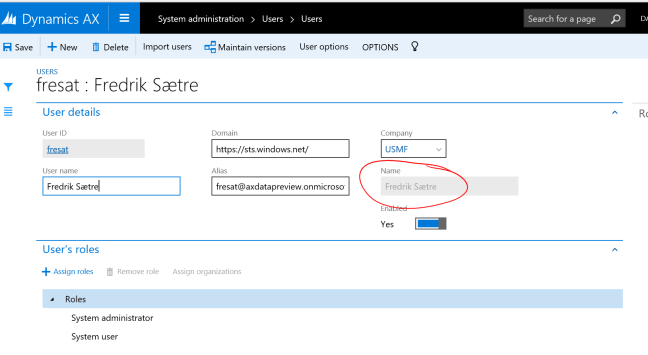
Check out the post on user setup for the Password and Badge ID fields.

I recommend using centihours as “Time presentation” as this is easier in conjunction with payroll.

I normally set “Restart at clock-in” to “Yes”. That allows the workers to check in and the system will try to continue on the job they where active on when signing out. If not, they will have to sign in to the job as well after they checked in.

If you set up the “Automatic” clock out function, the system will try checking the user out at the clock out time in their active profile if they forget to clock out after the given “Max. working minutes” has transpired since they clocked in.

I prefer to have a separate journal type for the “Inventory Adjustment” journals then what is standard to be able to see what is created from the terminals as opposed to the journal entry form.

AX7_TA_Parameters2

I would recommend to have different journal types for the Hour, Fee and Item journals then standard to be able to distinctly identify the T&A journals.

“Post automatically” set to Yes will post the journals at time of registration and post a offset journal when transferring approved time registrations. Setting it to No will post the journal, but waits until you have approved and then transfer the time registrations to do so.

If you want to use “Cost categories” as opposed to the hour rates from time and attendance for the project activities, then activate this.

Dimensions decide what way the dimensions should be inherited and what should be master in cases of conflicts where both jobs (projects/activities) and the workers have the same dimension filled out.

AX7_TA_Parameters3

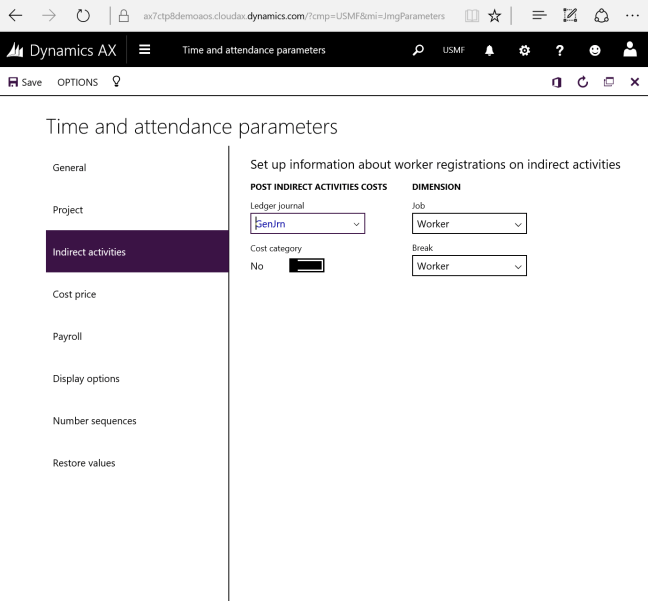
You can actually run time and attendance with a great insights by only using the indirect activities. You set up the cost handling here.

Set up a separate “Ledger journal” to be able to track the journals in the general ledger. You can use cost categories, which is a set cost for all activities, or get the data from the payroll transactions if you use this to the full extent.

Dimension can be set to a hierarchy or to a single record type either worker or the job. Most often use a hierarchy of “Worker -> Job” because that takes both in to account and the one (Worker in that case) overrides the other.

AX7_TA_Parameters4

In Time and Attendance you can either use cost categories or get the cost price from the payroll transactions. You will have to add rates to the pay types, but that gives you the possibility to have more accurate costing.

In this setup you select what is added to your cost price. I’ll go in to this more closely in a separate post.

AX7_TA_Parameters5.png

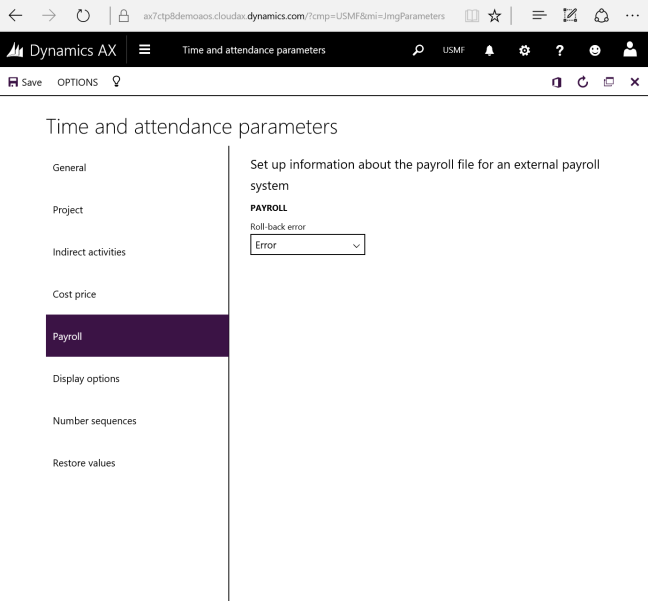
Best described by Microsoft help wiki: (Formated by me)

Specify whether the user can roll back registrations after pay transactions have been exported to a file. The following options are available:

  • Error (the user receives an error message, and the rollback is not performed),
  • Warning (the user receives a warning message before the rollback is performed)
  • Accept (the rollback is performed; no message is displayed to the user).

AX7_TA_Parameters6.png

More on this in “Electronic time card”.

AX7_TA_Parameters7.png

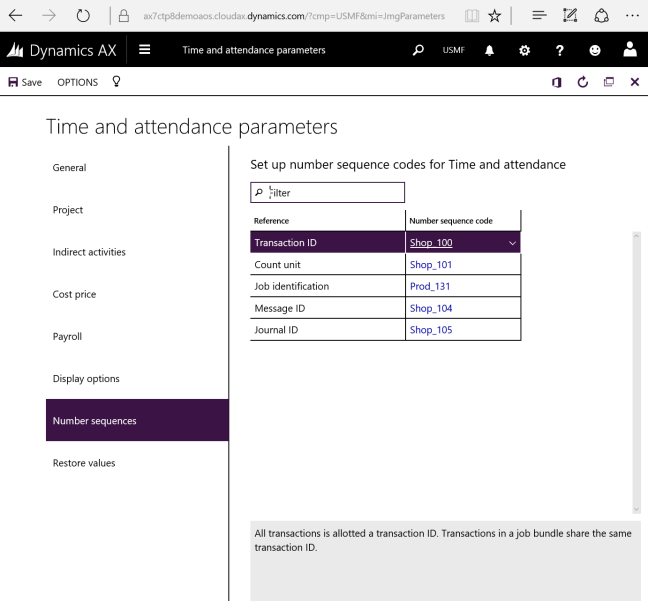
Setting up number sequences as in any other module: Use prefixes if you want to easily identify the series and never start a series with only zeros.

AX7_TA_Parameters8.png

This will restore your settings to the default setup if you get to far off… which i find kind of odd…

Go to the AX 7 – Time and Attendance guide page

AX7 T&A: Getting started

This is the first post in the AX 7 T&A guide series.

Time and attendance is a very flexible solution for registering attendance and absence as well as manufacturing execution and realtime project feedback.

AX7_TA_ClockIn

This is a pretty big setup job if you want it to be done properly. You can however get started right away! Following these steps will get you to start registering time clocking in and out.

1. First you need to run the configuration wizard under Wizards. This will create the required setting like system jobs in indirect activities (clock in/out, wait time, abort pause and more), terminal configurations and profile types.

This slideshow requires JavaScript.

2. Go to time profiles (Time and attendance > Setup >Time profiles > Profiles) and set up a profile single. This define the workers actual working times. You do not need to enter anything in to the profiles, but you need atleast to create a blank one for setting the required parameters on a user.

ax7_TA_Profile.PNG
3. Create the necessary groups. Just create a simple common group for the entire company.
  • Profile group
    Time and attendance > Setup > Time profiles > Profile groups
  • Calculation group
    Time and attendance > Setup > Groups > Calculation groups
  • Approval group
    Time and attendance > Setup > Groups > Approval groups

This slideshow requires JavaScript.

4. Go to the Workers (Human resources > Workers > Workers). On the “Time” pane in the menu bar under the “Maintain” group: Click on “Activate on registration terminals” and fill inn the required fields.

This slideshow requires JavaScript.

5. Now launch the Time and attendance registration terminal and select a terminal setup.
Common > Common > Time and attendance > Clock in/out (Punch clock)

AX7_TA_Terminal1
Use the “Clock in and out” for attendance.

You can now clock in and out using the employee Id (Leave password blank if not set) and do the same to clock out.

This slideshow requires JavaScript.

This is the bare minimum to actually start registering attendance. Cool thing is… If you’re only looking for the attendance part of the solution you can start punching time and do the rest of the setup later.

Go to the AX 7 – Time and Attendance guide page


AX7 – A smart and quick way to run a setup process

First off:

Now to the subject at hand… The Excel quick link process guide template (EQLPGT)!

I found a nice way to create a template to quickly reach menu items without amendments, coding or rummaging through AX 7 menus. It is simple… Yes, the Task recorder is awesome and can guide you in way more detail, but it also requires some more work. If you just need to get to the menu items quickly, then read on. 🙂

This is what you do.
Create an Excel spreadsheet and use the HYPERLINK function to sow together your links.
You need two general parameters: URL and CMP (Legal entity). Give the Excel columns these names to easily referencing them (Write the name in the cell name to the left of the formula bar).

Format: =HYPERLINK(URL,NAME)
Example: =HYPERLINK(URL&”?cmp=”&CMP&”&mi=”&[Cell],[Cell])

I’ve created a spreadsheet template with some data in it that I hope you will be able to use. Click the image below to download it.

AX7_ExcelQuickLinks


AX7 UI is getting even better

Just ran though this Office Mix: https://mix.office.com/watch/1ohsrrpsd02e1 and it shows the new UI features coming to AX7 CTP8 and the upcoming release. It looks very nice!

I strongly encourage you to look through it as there are a lot of nice to know things in it.
I highlighted a couple of things that I thought was cool below in this blogpost… and it is almost everything. 🙂 Click continue reading below to look at the highlights.

Love Office Mix by the way…

Continue reading AX7 UI is getting even better

Revise your AX strategy now

The new AX version (AX 7) is getting close to release and most of the cards are on the table. There are some changes, so if you are on AX 2012 or earlier versions there are some things you should take in to account right now to not go down or continue down a path of now return. So here are some coarse changes I suggest you take in to account.

Role centers and Business intelligence

Enterprise Portal
The role center is deprecated.
The Role center is deprecated and Work spaces are introduced as a replacement. Work spaces are high level forms tailored to a specific task like Production floor management, Budget planning, Customer invoicing and so forth.
If you’ve done work on your role centers, you should pivot your focus to Power BI. You should still be able to use your SSRS reports in the new Work centers, but they are vastly inferiour to the powerfull Power BI.
I’m not saying you should stop working on BI, but just take a look at the solution that will give you greater ROI later on.

Enterprise Portal or other web portal solutions

CSS

Most of Enterprise portal is deprecated in AX7. The good thing is that Microsoft is throwing it in the trash, but I do not know of any alternative to Customer Portal or Vendor Portal yet. I will be surprised if something isn’t brewing in the R&D team to replace this as well. We’re on a web platform already, so it shouldn’t be too far fetched to imagine a solution. When it comes it will be awesome and in tune with the default development of the rest of AX.
Employee self services has an alternative that is much better in the Employee self service Work space.
If you’re thinking of implementing the AX Enterprise Portal or further enhancing it, I would suggest you wait until the replacement solution known before you do more work. Of cause if it gives you great benefit in a short term then go ahead, but just don’t expect to get future value for your investments in that area.
If you have plans or have already created a separate web portal solution for customer or vendor interaction. I would also suggest waiting before taking on a greater project before the solution in AX is revealed.

Infrastructure

This is a pretty much an echo by everyone associated with Microsoft is saying, but here goes. Planning on scaling up your servers any time soon? Even if you’re doing minor hardware upgrade, you should strongly consider Azure. Through Life cycle services you can prevision servers that can reduce your infrastructure installation by weeks.

Need an on-premise solution? Take a look at Azure Stack. If that is over-kill, then you can use a hybrid cloud solution with your old equipment.

Bottom line is that if you start moving to the cloud today, you will be better prepared when upgrading to AX7.

AX7 – Filtering

As the UI changes, so also does the workflow. There are some new filtering features both good and bad. Keep in mind that I’m testing this on a prerelease version, so there are a few kinks to be sorted out yet, but I’ll bet you the’ll get there in time for launch.

Quick filter

On most of the forms the quick filter is available. I’ve written a post on this earlier as well, but in general it is a quick way to find the many different types of data in just one field. The field type is selected in the dropdown. It is mostly defaulted to filter on the Description field in the grid and is a Begins with filter. Notice that you can not use the AX filter annotations here with * and ? wildcards or date filters like “..” and “d”. It doesn’t work.

AX7_Newfilter3

Grid filter

The grid filter criteria are given for each field in the grid. Just tap the grid header and select the way you want to filter. Wildcard does work.

AX7_Filter_Grid.PNG

Microsoft has announced in a training video that they are going to work on this and might be more in tune with the Excel searches. Hopefully with the datatype dropdown which shows unique fields in strings and dates get this drill through feature. Searching on dates is a bit of a hassle, so I would use some of the other filter options.

The only thing that is in place in the CPT8 right now is for lookup fields.

AX7_Filter_Grid_Lookup.PNG

For filtering dates you can use dynamic dates like “01” is translated to the first of the current month this year and “0101” means the first of January this year. The date is transformed automatically and when you open it back up again, it shows you the transformed date. (Bug in the “Between” filter gives just “01” as value)
However you have to state the pattern of search from the date you use. You can not use the “..” syntax. This will have to be determined by selecting the right search parameter.

AX7_Filter_Grid_Date

The SysQueryRangeUtil works in this field, which is great.

Filter menu icon

AX7_Filter_ButtonActive.PNG

To the left of most (All I’ve seen) grids there is a filter button. Clicking on this pulls out an interface where you can add fields that are not in the grid. Same function as the grid fields. That means no wildcards here either.

Microsoft also said in the training video that I referred to earlier that they will be extending the features in this dialogue to contain some elements of the advanced filter options described below.

I will put money on the fact that at least a save function will be in here when the product is ready for release.

Advanced filter

The good thing is that the advanced filter dialogue still is available that we know and love from earlier versions is still available. By going to Options in the top menu and clicking Advanced filter/sorting you’ll access this familier AX filter options dialogue.

AX7_Filter_AdvancedFilter.PNG

There are some limitations for now, like that you can not use the short date versions (01..31, so use full dates for now), but it does function like before and you can save your queries like before.

AX7_Filter_Advanced_Range

You can also do Joins to other tables like before to make a rich filter criteria.

AX7_Filter_Advanced_Joins.PNG

Click to the left of the table name to add a table reference.

AX7_Filter_Advanced_Joins2.PNG

Then click Select to add it and it will be selectable in the range selection.

Summary

It looks like there are some faster ways to handle filters then before. I believe 90% of filtering will be done in the Quick filter and I’m excited to see the filter options from Excel being implemented into the grid filter.

The thing I’m missing is the nice AX filter features that AX users are used to like the date handler “..” to select the search pattern for date filters. I can’t seem to see a way to quickly access a filter that is stored either, but I bet you that that feature will be available once they move more features from the Advanced filter dialogue to the filter button. Hopefully you will be able to call a filter through the URL and store it as a favorite on your desktop. It shouldn’t be too hard to do that and will give GREAT value.

We’re still in preview, so I bet that the small kinks are worked out when the release is finished.


AX7 – Naming paradigme

The New Microsoft Dynamics AX, formerly known as codename Rainier, and then simply AX7 after it’s version number, is just around the corner. According to MSDynmicsWorld.com it is looking to be generally available as soon as March 2016, but what are we going to call it??

It is rumored that the new AX is just going to be called just that: “AX”. Microsoft does like many other companies have done before, and are removing the version number from the name. Like “The new iPad”…

Does this mean that it is the final version of AX and that from now on only improvements to the platform is going to be released? I bet we’ll see a version 8 down the road, but for now I’m happy with the notion that we’re going to have a continuous updated solution on a rapid release plan.

But we have to refer to some kind of version right? Are we going to call it “The new AX”, “The latest AX”, “The final AX”, “AX as a service”? All our customers are on AX. Some on AX 2009 (Version 5) and some on AX 2012 (Version 6), many companies even run version 3. I think I’ll just be calling it AX7 to be clear on what version number we are talking about.

AX7 – User Relations

In earlier versions of AX we had User Relations to connect a user to an employee or a contact for a customer or vendor.

In AX 7 this is actually simplified. It took me a while to find it, but when I did it was pretty obvious.

You can only connect a user to a contact. The type of contact is then related to some type of entity. Preferably an employee, because there are no customer portals any more.

This is what you do:
Go to the User form (System administration > Users > Users) and put the contact in the “Name” field.

AX7_UserRelation

If you wanted to change the relation you go to “maintain versions” in the top menu to update the record. This is pretty neat as it is date controlled and a user can change the party relation at a certain time, this also maintains your history.

Simple! Right?!

AX7 – Personalize forms (First look)

Updated: (24.12.2015) Found out how to add a new field!

In the interface you can personalize how the fields and menu items in the form. You access the options by right clicking on the field or menu item you want to personalize and selecting “Personalize: “.

AX7_Personalize1

This pops up a configuration windows that is tethered to the field you want to personalize.

AX7_Personalize2

You can rename the field, hide it, skip the field in the Tab sequence and select if it is editable or not.

It is possible to move the field right or left. In a structured form setting (not grid).

AX7_Personalize3

You can move a field anywhere in the Tab, but it is restricted to the confines of the Tab.

AX7_Personalize4

The “Clear personalization options” resets the label and check boxes to standard, but it does not put the field back in it’s place. Then you probably would need to delete your user form data or reset the entire grid.

Adding a new field

This took some figuring out, because I clicked in the fields and wanted to add a field, but that didn’t work. To find this option you have to click to the right of the form or on the checkbox on the table header.

AX7_Personalize10.PNG

Click the “Personalize: Grid”. This opens a dialogue on the top of the form. It overshoots my screen by one field, but this is the “Hide” field, and you probably don’t want to click that anyway.

AX7_Personalize11.PNG

Clicking the “+ Add a field” opens a dialogue to the right of the page.

AX7_Personalize12.PNG

I added a field from an added data source and not the top table. This issue had a weird effect in AX 2012, but it seems to work in this version. Nice!

AX7_Personalize13.PNG


Form information

Clicking “Form Information” opens a dialogue box to the right of the screen with some info.

AX7_Personalize5

One of the nice things is that you can see the SQL Query in this form.

Sharing between users

There are some interesting import/export options here which are used to share configurations between users.

The user sets up a form the way they want and exports this. The result is like this:

AX7_Personalize7

The XML contains all the changes to the form. This is then imported by another user and the changes are applied.