
In the Job card terminal you can register time on any job (Indirect activities, Project and Manufacturing). It is a highly configurable form with an option for both fields and menu items to be specified by the user doing the setup.
You find the configuration on Time and attendance > Setup > Configure job card > Configure job card terminals or Production Control > Setup > Manufacturing Execution > Configure job card terminals.
Terminal configuration
You can personalize any form in AX, but the job registration form is one of the most configurable interfaces except for the retail POS terminals. You can configure the buttons and fields by using the terminal configuration (Production Control > Setup > Terminals > Configure registration forms). The configuration wizard create some default terminal settings as shown here. Feel free to make you own.
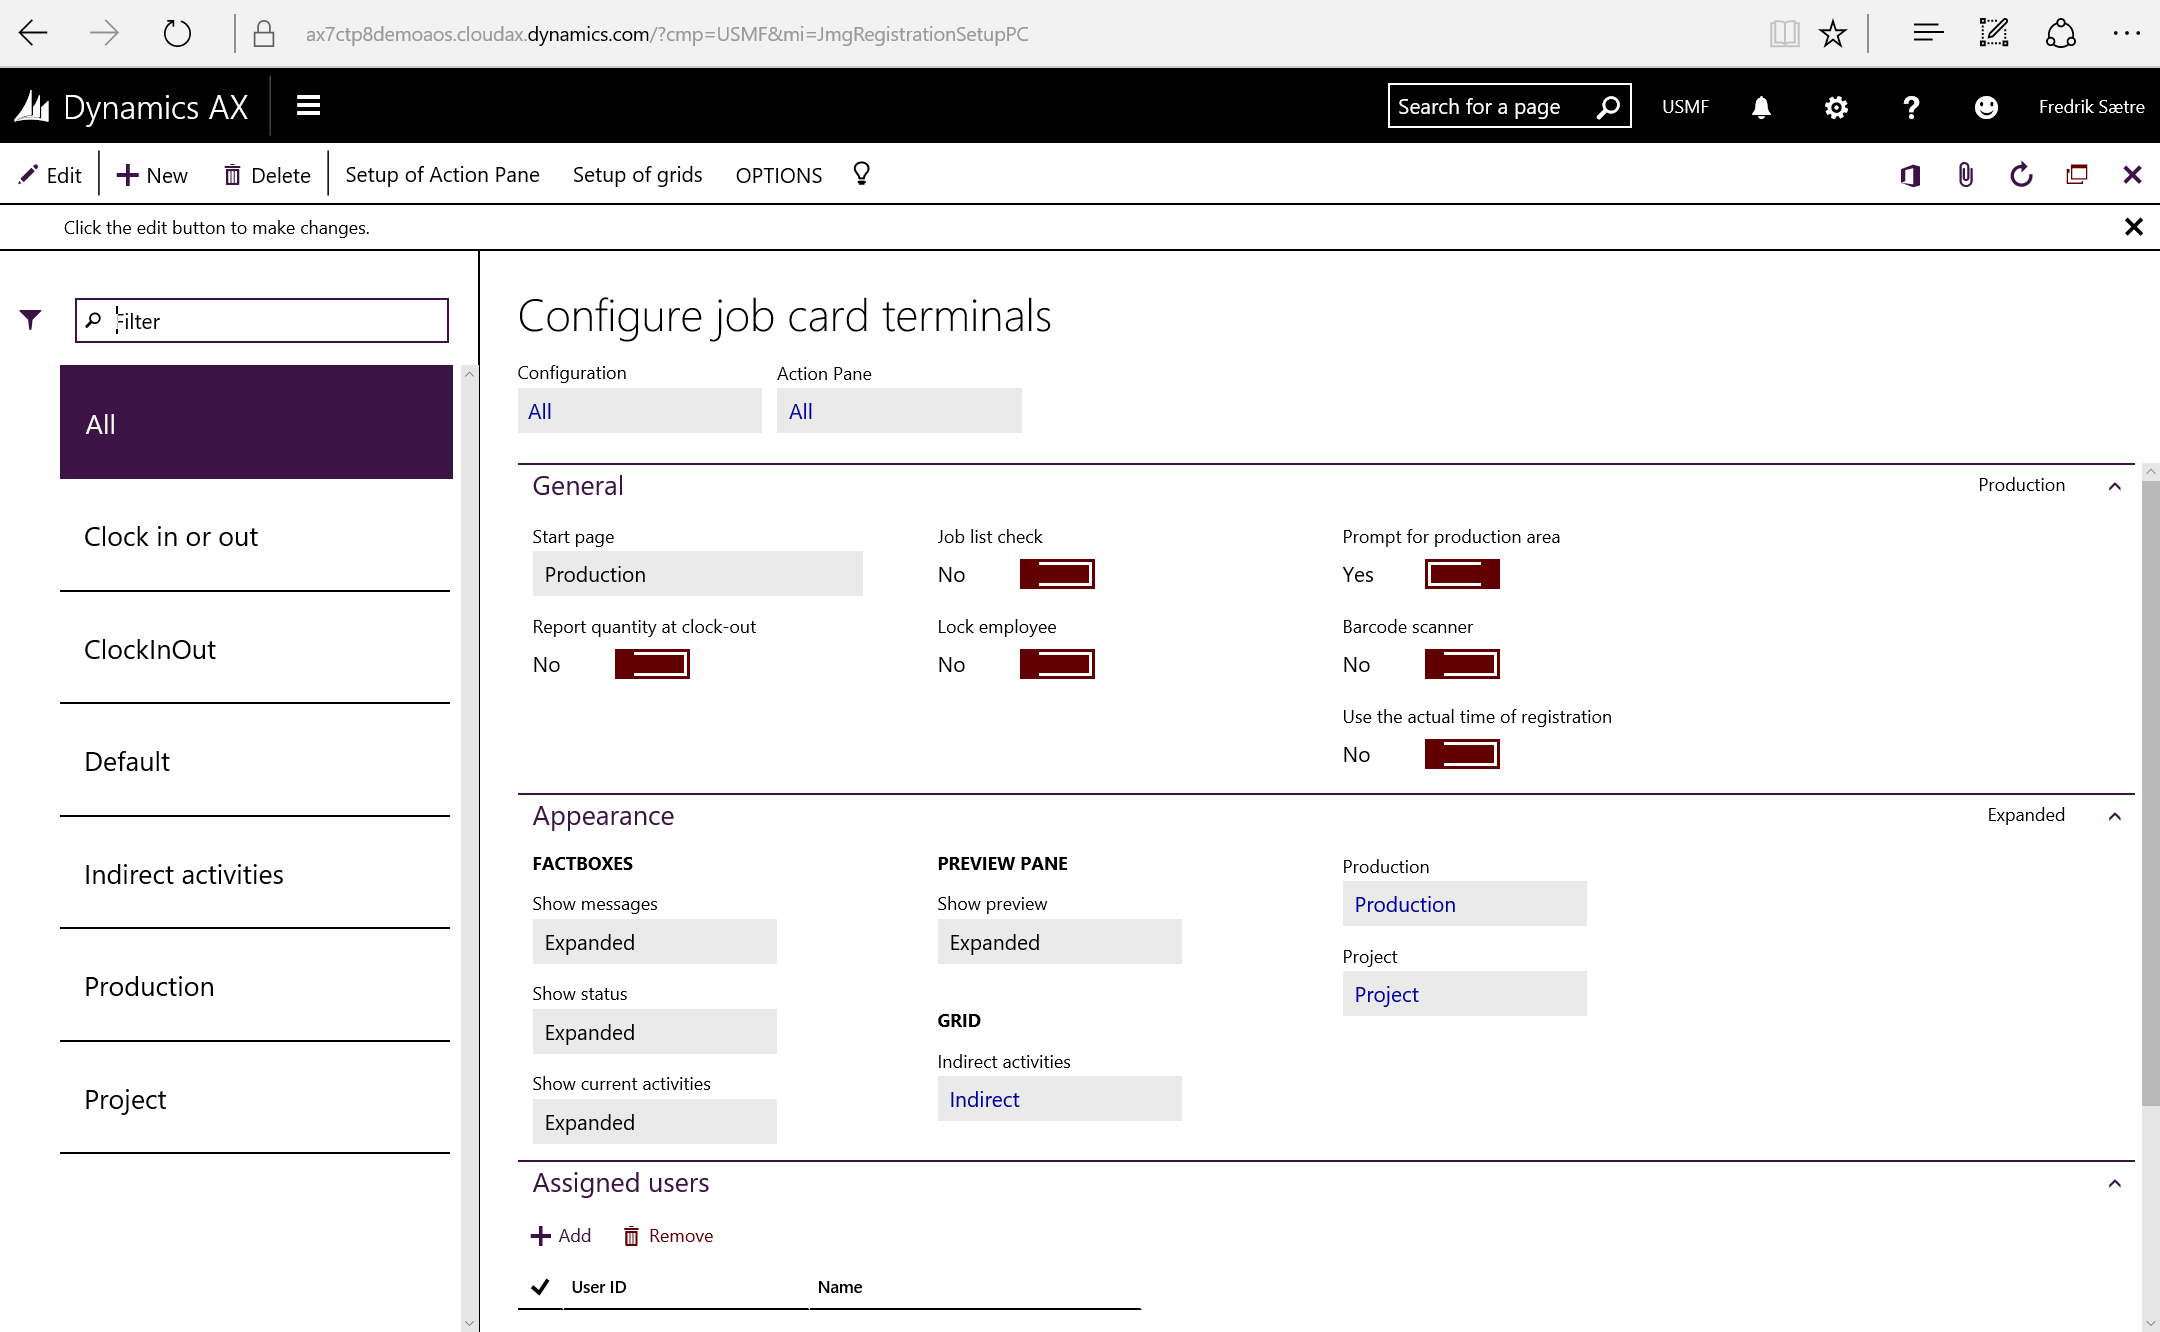
The Action pane parameter defines the configuration of the buttons and panes. You can configure these as you wish. More info on that below.
The Start page parameter defines the first page you are taken to when logging on. There are six options to choose from here.
- None
Returns to the logon screen. Used for punch in/out terminals - My jobs
If the employee is connected to a resource, the terminal filters project activities and production jobs that are planned on this resource. - Indirect activities
Displays the available indirect activities - Project
Display projects and project activities - Current Activities
Shows a list of jobs the user has activly selected. - Production
Shows production jobs
Report qty at clock out gives the user a dialogue for feedback when clocking out. Even on the punch clocks.
Job list check checks if the job fed in to the barcode field is available on the list displayed. This way the user can not start another job then is on the filtered list.
Lock employee means that the user can authenticate once and start and report on the terminal without being presented the login screen again. They have to manually click the switch user icon. Then the terminal is brought back to the login screen.
Prompt for production area gives a dialogue at start up to select the Production area, Resource group or resource and filters the production jobs accordingly.
Barcode scanner puts a generic job input field named “scanning”, that can be used to read the Job ID in to. This field is always first to be in focused (cursor active) when the form loads.

Use actual login time defines if you want to use the time the worker clocked in or the actual time where he selected the job and approved/started.
You can show, minimize or totaly hide Messages, Status, Clock and Preview pane.

You can select the grid setup for the Indirect activities, Production orders and Projects. You can configure these and choose what fields to be shown in the grid collumns and the preview pane. More on this below.
Setting up grids:
Click “Setup of grids” in the menu to access this form and simply add the fields, their order and whether or not they are going to be displayed in the grid or in the preview pane.

If you want to do add new fields to the forms, you should add it as a selectable field in this list and not fool around with the form directly.
Setup of action panes
The action panes are the menus you see on top of the form. They are also configurable within the limits of what is available.
The setup is built on a four level hierarchy
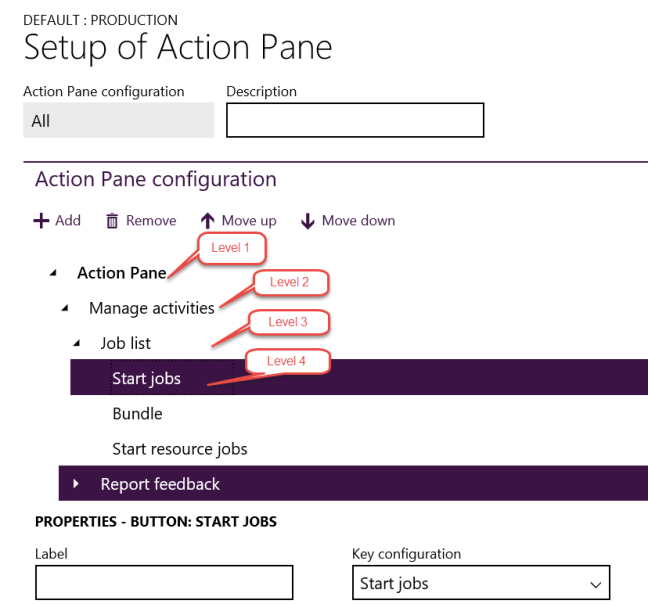
Level 1 = Root
Level 2 = Top menu item
Level 3 = Menu group
Level 4 = Action/Button
In the form it looks like this:

So build your menu tree and add the button functionality from the “Key configuration” list as the function of the menu item you’ve created.
If you want to do add new functions/buttons your self, you should add it as a selectable item in the “Key configuration” list and never to the Job card Terminal form directly.
Assigning users
The terminal configuration setup was in AX 2012 authenticated by the machine name that the AX client was running on. In AX7 this is related to the user that is logged on. A user can be associated with a single Device or Terminal configuration. A user that is not allocated a Device or Terminal will require to select a terminal type when launching the Job card Terminal form and will not be able to open the Job card Device form.

Adding a new user launches a dialogue that filters on the security roles assigned to the user and removes any user that has already been assigned to a job card terminal or device already.

When a user which is not assigned a terminal and launches the Job card terminal time, the system prompts the user for a configuration.
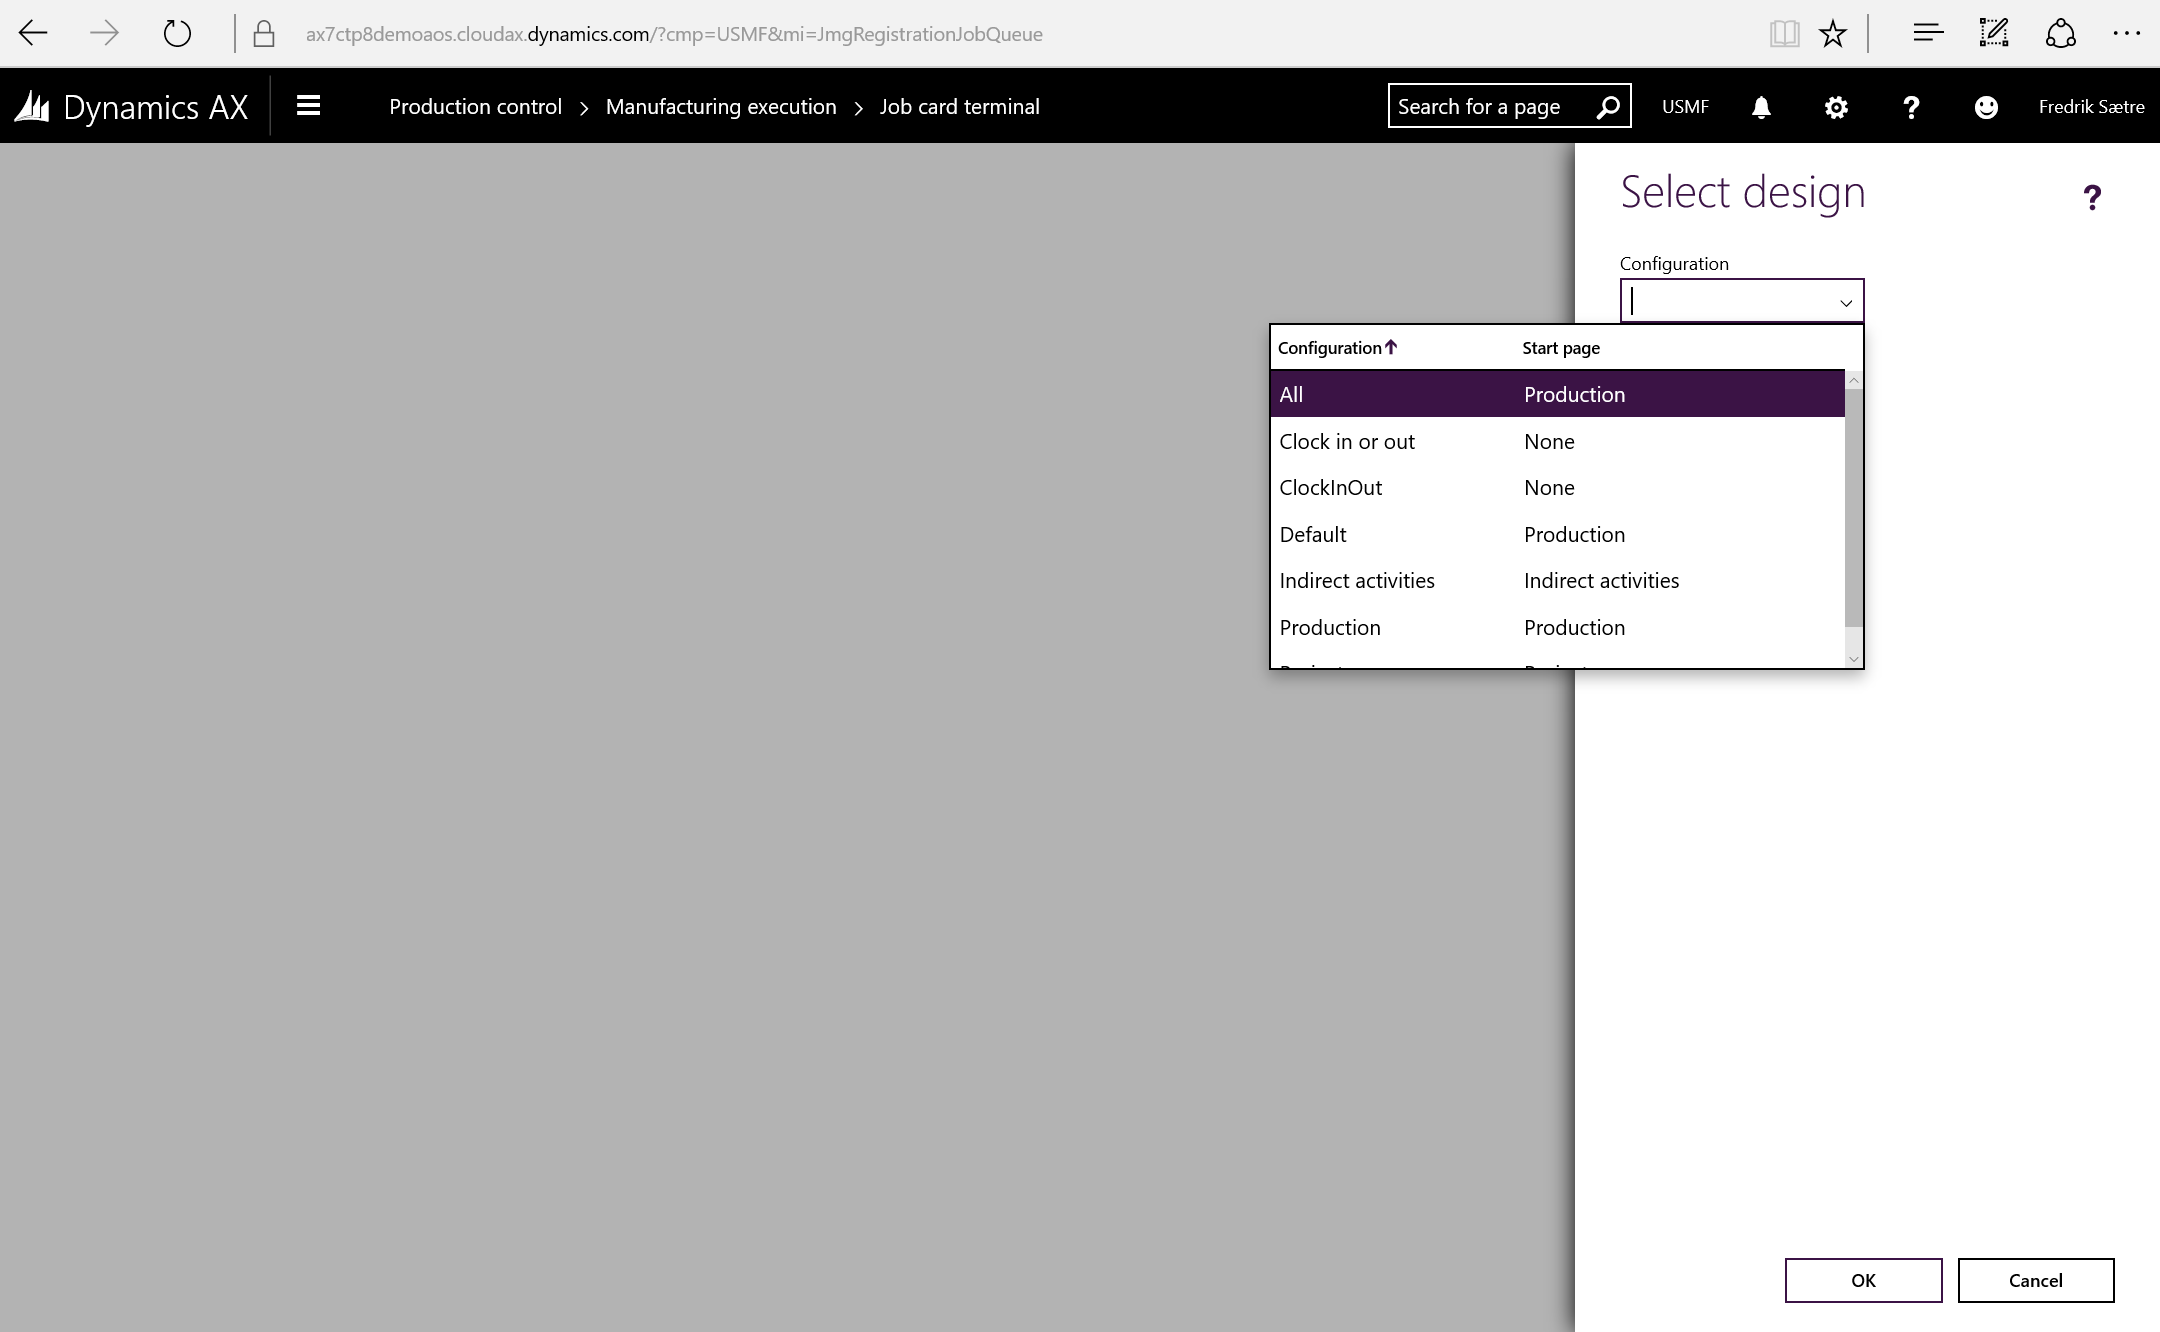
The user will be prompted for this every time unless assigned a Job card terminal.
To launch the Job card terminal go to: Production Control > Manufacturing execution > Job card terminal.

Hi Frederik.
Have you experienced that the cursor is not focused in the scanner field. We have experienced it from d.16.01.2020. We think it’s a browser or windows update.