
Flex time is often used and is a pretty concrete concept. You have core hours that the worker has to work and hours that vary from the clock in and clock out hours are posted to an balance that you can monitor. But I use this as a tool to monitor minor worker deviations as well. Even for workers who doesn’t have flex time.
My view on the matter: You don’t want to set up the system to be too strickt as this makes for a tight regime and a lot of input needed. I use this as a method of monitoring the small deviations that occur daily in all companies and simply letting the employees them selves be in charge of their work times and by the end of the week or month make sure that you have a balance around 0. Hours owed are deducted and hours earned are reset to 0 and lost. Use a small flex window like 30 minutes to handle the smaller deviations, but keep track of the hours. So the cronic late commers will owe and be deducted at month end. I’ve convinced many companies to start using this concept instead of the old ways because this is a win win win concept. Even in old school manufacturing companies where they used to alarm bells to ring in the shift have been converted to a more dynamic environment for the employees. Increasing the productivity, vastly reducing the amount of absence occurances and manual controls, boosing moral and thus making the recycling of employees lower.
Basics
What the flex functionality basically does is to maintain a flex balance. It can also use this as a pay type to keep an overview in an external payroll system.
Workers are a part of a flex group that sets boundries, but the boundries can be broken. It can adjust the flex balance to fall back within the boundries of the flex group by running a job which may or may not create pay transactions (either positive or negative). The adjustment is normally performed right before payment transfer is executed.
You can get reports on people working outside their flex boundries for manual Control as well.
Setup
The setup for flex Groups are located at Human Resources > Setup > Time and Attendance > Groups > Flex Groups

The categories Flex minimum and Flex maximum contains the settings for the boundries of the flex account.
If “Adjust flex max or min is activated the system will increase or reduce the account balance and pay the pay type assigned. You can use a Pay type factor to get more or less for each hour flex.
Setting up Flex balance pay types is used to be able to have an overview of your flex balances in your payroll systems.
User setup
After the flex groups are created you add it to your workers information.
Go to Human Resources > Workers > Time registration workers | Employment > Time registration > Flextime
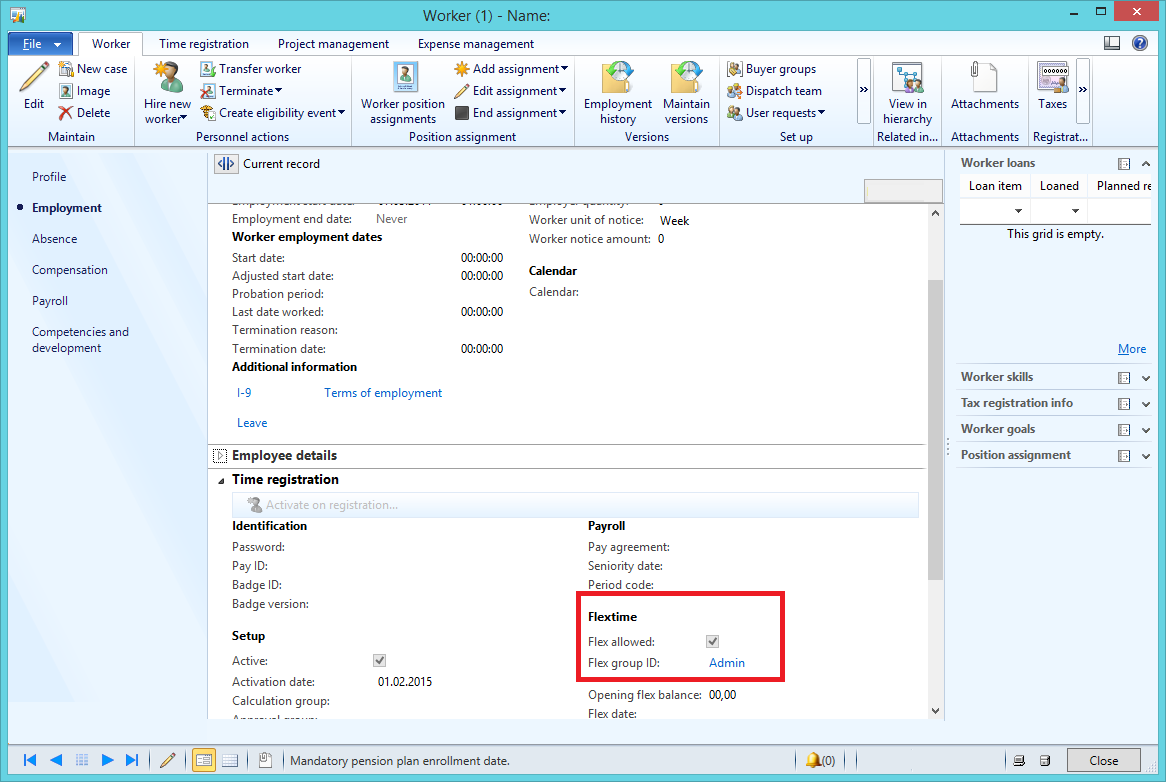
When “flex allowed” is checked and “Flex Group ID” is selected you will be able to use profiles with flex +/- in them for this worker.
Next we’ll look at how to set up a profile with flex.

One thought on “Time and Attendance (Part 22/31): Flex setup”